by Aisha Zakari | May 29, 2022 | Food & Kitchen
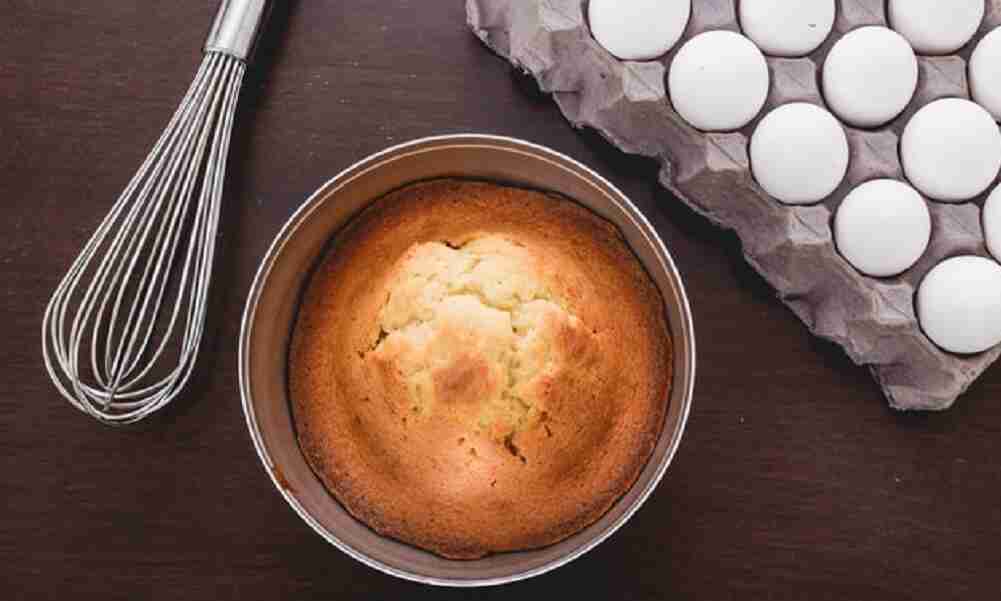
Sponge cake (or yellow cake) is a soft, spongy, and delicious cake with a brownish outer surface and a whitish inner surface. This is made with lots of eggs, sugar, and flour, and I’ll be walking you through the sponge cake recipe.
Equipment for Making Sponge Cake
Ingredients for Making Sponge Cake
1 cup of flour
3 tablespoons of milk (optional)
3 tablespoons of oil
4 eggs
¼ cup of sugar
¼ cup of butter
½ tablespoon of vanilla essence
Procedures for Preparation of Sponge Cake
STEP 1: Crack your eggs and separate the yolks from the whites in different bowls.
STEP 2: Meanwhile, preheat the oven to 350F.
STEP 3: In your bowl of yolks, give this a whisk and add milk, oil, and vanilla essence.
STEP 4: Gradually sift the flour into the bowl and give it a stir. Mix until well incorporated and set this aside.
STEP 5: In the bowl of whites, using a hand mixer, beat for 20 minutes from medium to high until it begins to foam.
STEP 6: Add in sugar and continue beating till stiff peaks. Here, you see the egg whites looking thick, creamy, and white.
STEP 7: Now add this to the bowl of yolks. Fold it in and mix.
STEP 8: Get the clean baking pan. It’s time to bake this sponge cake recipe.
STEP 9: Grease the pan with butter and add parchment paper to the sides and bottom of the pan. You may also dust with flour after greasing.
STEP 10: Pour the batter into the prepared pan. Do not fill to the brim to avoid pouring while baking.
STEP 11: Bake for 25–30 minutes or until a toothpick comes out clean when inserted in the middle of the pan. Do not open the oven while baking.
STEP 12: Remove from the oven using a hand glove or mittens.
STEP 13: Allow it to cool for 5–10 minutes or place it on a rack for easy air ventilation.
STEP 14: Enjoy!
Recipes that Best Goes with It
Sponge cake goes with ice cream, milkshakes, and, of course, soft drinks like Coca-Cola, etc.
How to Serve Sponge Cakes
Sponge cake should be served to friends, loved ones, and family immediately as it cools off. You can also enjoy sponge cakes with these 3 different ways of making chocolate sauce.
Occasion to Serve Sponge Cakes Best
This delicious sponge cake recipe can be served any day, anytime, and anywhere. It could serve as a lunch box for kids, birthday parties, or after-party snacks.
Nutritional Value of Sponge Cakes
This snack is packed with benefits such as low calories when eaten, a good source of energy, and, of course, the unique flavors in your kitchen.
How to Store Sponge Cake
Store in the freezer for 2–3 days. I suggest you wrap before storing and also consume within a day. Enjoy!
Conclusion
Are you in the kitchen already? Whisk up this recipe and tell us how you made this soft, fluffy, spongy, and delicious sponge cake recipe. Be sure to let us know when you do in the comment section.
FAQs
Can I use butter or margarine for my sponge cake?
With margarine, you get a softer and more fluffy texture in cakes than with butter. Butter has a great taste and smell but it makes cake dense and dries out the moisture. Margarine should be your go-to when making this sponge cake.
What is the difference between regular cake and sponge cake?
A very good difference between regular cake and sponge cake is that the latter is made with lots of eggs, while the former contains baking powder or baking soda.
What is the difference between butter cake and sponge cake?
Butter cake relies on butter or margarine and some leavening agents such as baking powder and baking soda, whereas sponge cake relies on the beaten eggs and air that gets into it.
What are the four types of sponge cakes?
These are Swiss roll sponge, Devil’s Food Cake, Forrest sponge cake, Angel Food Cake, and many other types of sponge cakes.
What is the secret to sponge cake?
The secret to sponge cake is in its texture, the eggs, and the absence of leavening agents like baking soda and baking powder. In sponge cake, the leavening agents are in the eggs and the air is gotten from beating them using the mixer. Sponge cakes are soft, light, fluffy, and airy, and this is a result of beating egg whites.
by Aisha Zakari | May 29, 2022 | Food & Kitchen
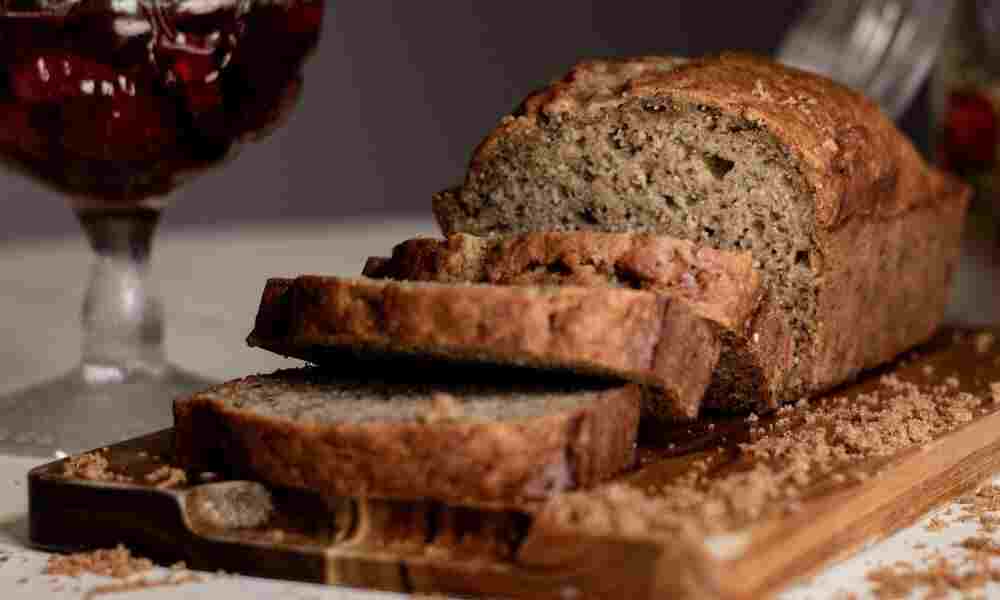
Do you ever get bored of the same old bakery bread? Do you ever want to try something new with bread? If this thought has run through your mind, then how to make banana bread recipe is for you!
Too often, I find bread to be bland and I tend to crave something new and interesting. Sometimes, I opt for sponge cake, cupcakes, or something sweet at the very least. In this article, I’ll be sharing with you how to make the moist and delicious banana bread recipe for friends and family and, most of all, for yourself. So, sit back, relax, and enjoy this recipe.
Equipment for Making Banana Bread
Ingredients for Making Banana Bread
2-3 overripe bananas
½ teaspoon baking soda
76g of melted butter
A pinch of salt
150g of sugar
1 egg
1 teaspoon of vanilla extract
205g of flour
80g of plain yogurt (optional but this adds moisture to the bread)
Nuts (your choice but optional as it gives it a crunchy taste)
1 cup of chocolate chips (optional)
Procedures for Making Banana Bread
STEP 1: Before you put your hands to work, preheat the oven to 350F and butter your baking pan. A small baking pan is more than okay for this.
STEP 2: Now, let us get you started on how to make banana bread.
STEP 3: In a mixing bowl, mash your bananas using a fork until completely smooth.
STEP 4: Add melted butter into the bowl.
STEP 5: Add baking soda and salt.
STEP 6: Again, add in sugar, an egg, and vanilla extract. If you’re using yogurt, add it in.
STEP 7: Lastly, add flour, nuts, and chocolate chips (if you will be using them) and mix them in.
STEP 8: Get your pan and pour the batter into it.
STEP 9: Bake for 50 minutes to an hour after placing the pan into the middle of the oven at 350F
STEP 10: Bake until a toothpick comes out clean when inserted in the middle.
STEP 11: Take out of the oven using a mitten and allow it to cool for a few minutes.
STEP 12: Now, remove the bread from the pan and let it cool completely before serving.
STEP 13: Using a knife, slice and serve.
How to Serve Banana Bread Recipe
Now that you know how to make banana bread, how do you serve it? Slice and serve your banana bread as breakfast and dessert along with fruits such as strawberries, raspberries, and jam. Another way of enjoying this recipe is along with fruit juice such as orange, or apple, or serve with toppings like peanut butter, Nutella or chocolate drizzle, or even caramel drizzle.
Occasions to Serve Banana Bread Recipe Best
Banana bread recipe is mostly eaten over breakfast with friends and family and eaten as dessert to savor something sweet and delicious. You can make this for birthdays, Eid celebrations, and even on special days to share with loved ones.
How to Store Banana Bread Recipe
Place your loaf of bread in a plastic wrap and store it in an airtight container. You can store it for up to 2-3 days.
Nutritional Value of Banana Bread Recipe
Whether you’re making your banana bread recipe at home or buying it online, it can be a health bomb or a health attack. Banana bread recipe has been proven to be packed with proteins, energy-boosting, and contains fats but healthy fats.
Conclusion
This recipe is not only delicious but moist and sweet and the ingredients on how to make banana bread are most definitely lying around in your pantry/store at home. When you go to the market, be sure to buy some bananas so you can make them at home. Be sure to let us know in the comment section when you make some.
FAQs
What is the difference between banana loaf and cake?
Banana bread is made just as above, it is dense and banana is used while the cake is made with banana as the main ingredients. Here, banana bread was used mostly as a flavor and taste.
Do I need a mixer for my banana bread recipe?
No, you do not need a fancy mixer to whip this recipe up. A simple bowl, a fork, or a whisk is all you need.
Do I fill the batter to the brim of the pan?
No, fill the pan halfway and never to the brim of the pan. If you by chance have excess, use another pan to bake it.
Why is my banana bread hard?
In baking, mistakes such as overmixing batter can happen. Instead of mixing when you add in ingredients, add all the ingredients in a bowl and give it just a mix instead of adding one at a time and mixing when you do.
Why is my banana bread brown?
This is because you added too much baking soda. Too much baking soda increases the alkalinity or basicity of your batter. Remember to use just ½ teaspoon of your baking soda.
by Aisha Zakari | Apr 2, 2022 | Food & Kitchen
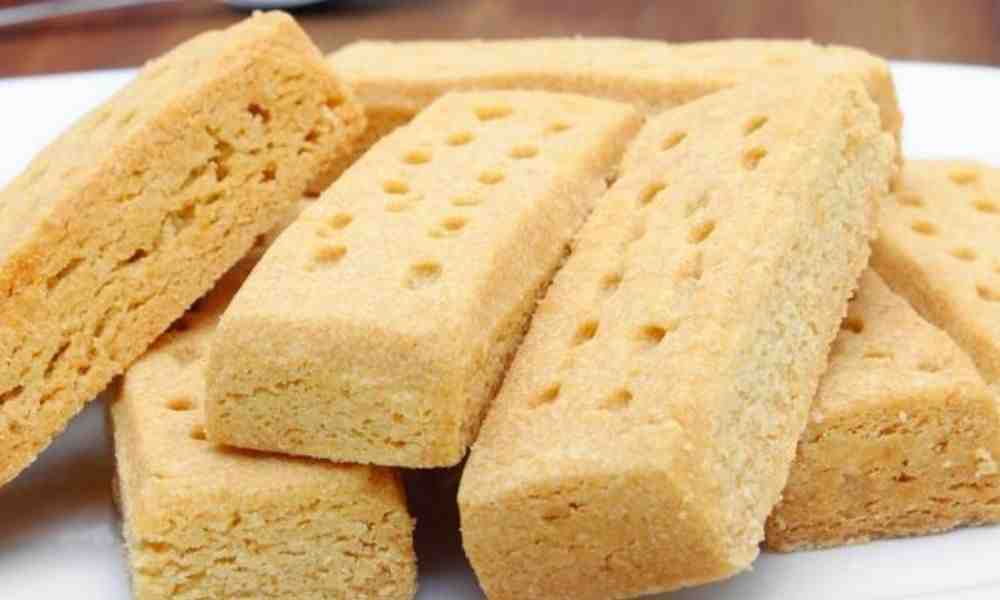
Shortbread, as the name implies, is a finger food to munch on every now and then. This shortbread recipe can be made with just a few ingredients that are mostly lying in your pantry. Let’s get baking.
What is Shortbread?
Shortbread is a traditional Scottish snack with a recipe of one part sugar, two parts butter, and three parts flour. Shortbread doesn’t contain any leavening agents, such as baking powder or baking soda, but mainly just 3 ingredients. Isn’t that interesting?
Equipment for Making Shortbread
Ingredients
2 ½ cups of flour
1 cup (227g) of cold-temperature butter (not margarine)
½ cup of sugar
Procedures for Preparation of Shortbread
STEP 1: In a bowl, add butter and sugar.
STEP 2: Cream this together using an electric mixer for around 5-7 minutes until it becomes creamy, light, soft, and fluffy. Then;
STEP 3: Add in the flour and mix this together till the mixture looks like crumbs. Set the mixer aside.
STEP 4: Lightly grease a baking tray and transfer the dough to it. Now, use your hands to spread it around the edges of the tray.
STEP 5: The dough will be crumbly, but you should be able to press it easily along the edges of the tray. Be careful when pressing.
STEP 6: Using a fork, poke in holes and sprinkle sugar all over the top of the dough.
STEP 7: Now, preheat the oven to 350F to help bake this shortbread recipe. Then;
STEP 8: While preheating, place the baking tray in the fridge for 20 minutes before finally baking.
STEP 9: Place the baking tray in the oven and bake for 20–25 minutes, until the edges get brown and not the top. The edges alone should be brown.
STEP 10: You can cut out the edges and enjoy just the insides, but if you like the crunchy brown sides, enjoy. You can still sprinkle more sugar on top while it’s still warm.
How to Serve Shortbread
Shortbread can be served over tea, a cup of warm milk, or a cup of coffee. You can also enjoy this by drizzling over Caramel Sauce or chocolate sauce
Occasion(s) to Serve Shortbread Best
This recipe can be enjoyed over breakfast with friends, family, loved ones, and even as a couple. It can also be made for Christmas, birthdays, or any other occasion to entertain guests.
How to Store Shortbread
A shortbread recipe can be stored in metal tins, airtight containers, or Ziploc bags for at least 10 days in the refrigerator. If you want them to last longer, freeze them.
Nutritional Value of Shortbread
This sweet tooth delicacy is packed with calories and consuming more than 2-3 may just make you add in weight. But if you’re lucky and do not add in weight, no matter what you eat, you can enjoy this snack. But be careful with your teeth too.
Conclusion
Shortbread recipes are very light and easily digestible, as they are finger-licking and easy to munch on. You can also cut out your own desired shapes and enjoy this any day and anytime. Let us know in the comment section when you give this recipe a try.
Frequently Asked Questions (FAQs)
How is shortbread made?
Shortbread is made from flour, sugar, and butter. These ingredients are mixed until crumbs are formed, and then they are baked in the oven for 20–25 minutes.
Can you make shortbread without an electric mixer?
You do not need an electric mixer to whip up this delicacy at home, but be ready to put your hand to work. Whisk or beat the butter and sugar together till light, creamy, and fluffy.
Should butter be cold or room temperature for shortbread?
Cold-temperature butter is preferable when making a shortbread recipe so as to prevent the dough from being greasy and difficult to roll. Have your butter sit in the refrigerator for around 20 minutes.
Why is my shortbread not crispy?
There are many reasons why this may be happening to you. It could be that the temperature of the oven is not set right, the dough was pressed out or too dry, there is insufficient butter, or there is overbaking. Be sure to measure your ingredients correctly and follow the right procedures.
Are shortbread cookies the same as butter cookies?
No, they are not. Butter cookies are lighter and softer in appearance, whereas shortbread is dense.
How long does shortbread take to harden?
Simply put it in the fridge to chill for at least 15-20 minutes till it hardens.
Why are there holes on shortbread?
Not only do the holes beautify the shortbread, but they also help in evenly distributing heat and making baking easy.
What is the difference between Scottish shortbread and regular shortbread?
There’s no difference between both shortbreads, as the procedures and ingredients are all the same.
by Fatima Sani | Dec 18, 2021 | Local Delicacies
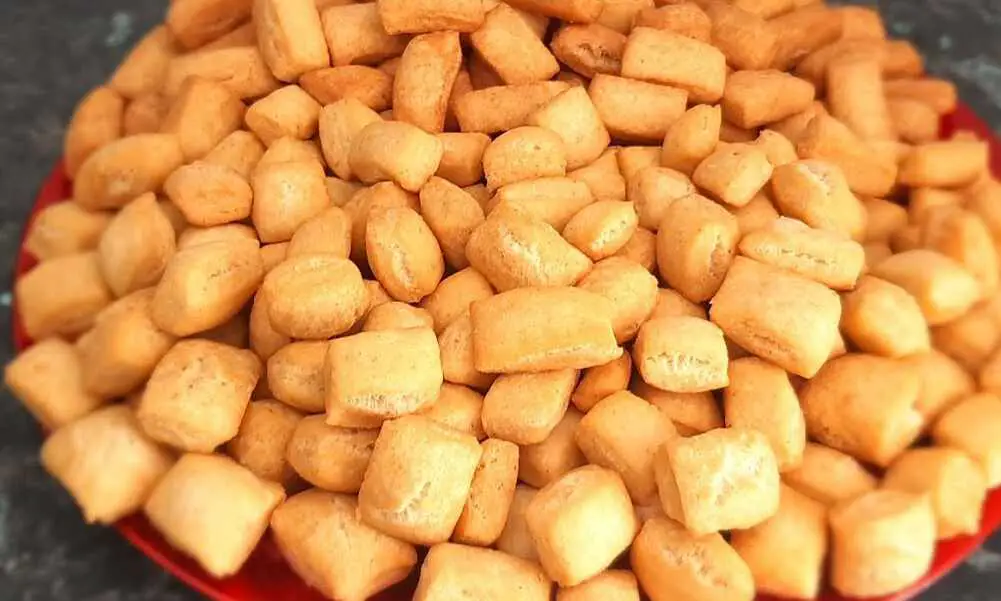
Cincin recipe otherwise spelled as ‘chin chin’ is a popular snack among Nigerians. It is consumed by almost all tribes and ethnic groups. They are common recipes for weddings, birthdays, festivals, etc. Its common ingredient is flour. In addition, it is a delicious snack, easy to make, and mostly loved by all children.
Do you have a wedding ceremony, eid, or festival and you find it difficult to come up with a snack to consume or use as a takeaway delicacy? Worry no more as I have come to your aid.
Equipment for making Cincin
Mixing bowl
Frying pan
Sieve
Scissors
Knife
Container
Ingredients
For the making of Cincin, you will need to follow the ingredients:
4 cups of flour.
1 cup of powdered milk
2 teaspoons of powdered vanilla flavor
Half a teaspoon of ground nutmeg
Small pinch of salt
3 eggs
Half a teaspoon of baking powder
Vegetable oil
1 butter
Water
Procedure for Making Cincin
STEP 1: The first thing to do is, crack the eggs in a small bowl and add a pinch of salt. Whisk together and set aside.
STEP 2: Put the sugar into a bowl, add the milk and mix.
STEP 3: In a clean bowl, sieve the flour, add baking powder and nutmeg to the bowl, and mix well. Then;
STEP 4: Add the butter to the flour and mix it very well too.
STEP 5: Add the mixture in STEP 2 and STEP 1 to the flour and mix it very well with your clean hands until a smooth dough is formed. Then;
STEP 6: Place the dough on a flat surface spread it with flour and start stretching the dough gently. However, ensure the dough isn’t too long or too thick.
STEP 7: When the dough is somewhat flat enough, use a knife and cut it into desired shapes and sizes. You could also use a scissor to do the cutting. Here, you will hold the dough with one hand and use the scissors to cut it with the other hand. For me, it is quite faster than using a knife.
STEP 8: Place a clean frying pan on medium heat, add your vegetable oil into the pan, and slice some onions into it too. Allow to fry for 3 minutes.
STEP 9: Add the cincin pieces to the hot oil and fry until it turns golden brown. Then;
STEP 10: Use a spoon to get out the fried cincin into a sieve container and allow them to cool.
STEP 11: Aaaaand your cincin is ready!
How to Serve Cincin
Cincin is usually served on plates. They can be consumed alone or with drinks. These drinks could be Kunun Zaki, Kunun Aya, carbonated drinks (though not good for your health), or other local drinks that we have.
Occasions to Serve Cincin
There are numerous occasions to best serve this delicacy or snack. It could be served in wedding ceremonies, during Sallah or Christmas periods, or during festive periods. Etc. In addition, it can be consumed anywhere, anytime.
Furthermore, they can be a part of the delicacies or snacks packed as souvenirs for guests during wedding ceremonies. In a Hausa family, Cincin is usually given to the bride among other snacks as she is taken to her husband’s house. This is to serve guests or visitors coming to wish the family well. Pretty much useful right?
How to Store Cincin
Cincin should be stored in a cool dry place. One good thing about its features or qualities is that it can last for several weeks without spoiling. Ensure to store it in the right container though.
Nutritional Value of Cincin
The Cincin recipe is majorly composed of carbs but also has moderate amounts of protein. Here are the nutrition facts for 3.5 ounces which is equivalent to 100 grams of whole-grain wheat flour: calories (340), water (11%), protein (13.2grams), sugar (0.4 grams) carbs (72 grams), fibre (10.7 grams), and fat (2.5 grams).
In addition, the consumption of Cincin has many health benefits which make it an interesting delicacy.
Conclusion
Conclusively, it is important to note that when you put too much egg in cincin recipe, it sucks up the vegetable oil, and too much vegetable oil in the human body is not healthy. However, additional eggs make it softer and not too crunchy.
If you find this article helpful, please leave a comment in the comments section below. Thank you.
You are always welcome to Northpad Nigeria for more local Northern Nigerian delicacies.
