by Fatima Sani | May 8, 2022 | Local Delicacies
Some combinations of foods are just amazing and will make you wonder, ‘Who first thought of preparing this food?’ Dawa da Wake is a northern Nigerian recipe mostly consumed by the Hausas. It is a combination of guinea corn (dawa) and beans (wake) to produce a finger-linking, sumptuous meal that will make you crave more after you first taste it. In this article, I will be teaching you how to make Dawa da Wake (yadda ake Dawa da Wake).
Equipment for Making Dawa da Wake
Ingredients
The following ingredients are needed when preparing Dawa da Wake:
Dawa (guinea corn)
Wake (beans)
Palm oil
Kuli Kuli (groundnut cake)
Water
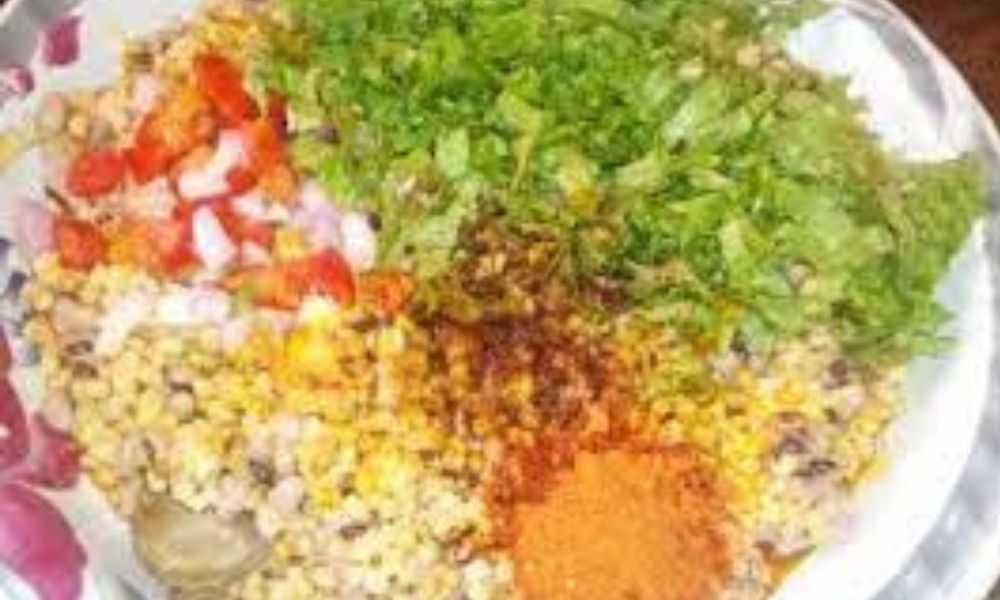
Salt, Maggi, cabbage, spinach, onions, and tomatoes
Procedure for Preparing Dawa da Wake
STEP 1: Get a big mortar and pestle, pour the guinea corn seeds into it, sprinkle a little water on it, and then pound for like 30 minutes. This is called surfe in the Hausa language.
STEP 2: Pour the pounded guinea corn (dawa) into a large tray and try separating the seeds from the shaft. This is called bakace in Hausa.
STEP 3: Wash the guinea corn very well and drain it, then set it aside.
STEP 4: Over medium heat, put a clean pot, add your beans to it, and allow 10 minutes of cooking time. Then;
STEP 5: Pour the guinea corn and allow to cook for 40 minutes together with the beans
STEP 6: Turn off the heat, pour in a warmer, and set it aside. Then;
STEP 7: Slice your onions, tomatoes, and spinach and set them aside.
STEP 8: Get a clean mortar and pestle and pound the groundnut cake (Kuli-Kuli) until it is slightly coarse in texture. Then;
STEP 9: Get a frying pan over medium heat and fry the contents in STEP 7 for 5 minutes.
STEP 10: Ta-da! Your Dawa da Wake is ready for consumption.
How to Serve Dawa da Wake
Dawa da Wake is best served hot with a chilled drink of your choice.
Occasions to Serve Dawa da Wake Best
Dawa da Wake is mostly consumed or eaten as a basic meal (lunch, breakfast, or dinner). It is hardly served on grand occasions like weddings, birthday parties, festivals, etc.
How to Store Dawa da Wake
It can last for many months without refrigerating as long as it is kept in a safe place away from children and rodents.
Nutritional Value of Dawa da Wake
Guinea corn helps to provide essential minerals and nutrients such as potassium, phosphorus, and calcium. In addition, it aids in the prevention of diabetes, obesity, and cancer. It also aids in the prevention of heart disease and constipation.
On the other hand, the beans in it help in the provision of folate, protein, and antioxidants. It also helps in reducing the risk of cancer, and prevention of fatty liver, among other benefits.
Conclusion
Dawa da Wake is easy to make. The only stressful part is removing the shaft of the guinea corn seeds (i.e., the surfe part). We all know that pounding is not easy, and this one takes minutes to achieve the desired result, depending on the quantity you intend to have.
You could just prepare this meal in jollof form.
I’m optimistic that this piece was worthwhile for you.
Anyway, that’s a wrap for this delicious meal. Now that you know how to make Dawa da Wake (yadda ake Dawa da Wake), why don’t you try making it for yourself or your family and tell us your experience in the comments section below?
You are always welcome to Northpad Nigeria for more local Northern Nigerian delicacies.
by Abu Hafsah | Jan 23, 2022 | Local Delicacies
As the name implies in Hausa, Kunun Gyada is derived from Kunu (meaning pap) and Gyada (meaning groundnut); when you put the two words together, you will have Kunu Gyada, meaning Groundnut Pap. It is a pap that is very popular in northern Nigeria, most especially among the Fulanis, whom you cannot wait to add to your meals, especially breakfast, although Hausas are beginning to embrace the consumption of this recipe too.
There are two ways to prepare the Kunun Gyada: one with rice and one without. In this article, I will take you through the process of making the two. There are two major ingredients for preparing Kunun Gyada that need processing before usage: groundnut and guinea corn. It is paramount that you know how to go about processing the two. Let’s see how:
How to Process the Groundnut for Kunun Gyada
STEP 1: Get your groundnut (preferably the one with the red back because it contains less oil) and pick the dirt from it.
STEP 2: Over high heat, put a frying pan (the size of the frying pan should depend on the quantity of groundnut) and pour sharp sand (sandy soil) into it. Then;
STEP 3: When the sand gets very hot, pour in your groundnut and stir at regular intervals—say, 5 seconds of waiting time in between stirs. Roast for 20 minutes
STEP 4: When roasted, put the frying pan down and spread on a hard surface so as to cool faster.
STEP 5: Pick out the groundnut from the sandy soil. Then;
STEP 6: Peel the back of the groundnut.
STEP 7: If the groundnut isn’t much, you can use a blender by adding a little water to it and blending until it turns into a paste. However, if it is in large quantity, take it to a commercial grinding machine.
How to Process the Guinea Corn for Kunun Gyada
For the guinea corn, well, there are two ways you can have it: either in powdered form or in the form of a paste. For the one in paste form:
STEP 1: Pick the dirt from the guinea corn and wash it well.
STEP 2: Soak in water for 6 hours. You could do that overnight if you intend to make it in the morning.
STEP 3: By now, the grains are already soft. Good.
STEP 4: Wash the grain again and add ginger and kaninfari (cloves).
STEP 5: If it is in small quantity, you can use a blender. Blend it until it turns to paste. If it is a large quantity, I will advise you to take it to a commercial grinding machine.
For the powdered form:
STEP 1: Pick the dirt from the guinea corn and wash it well.
STEP 2: After washing, drain it well and spread it on a mat outside to dry. Then;
STEP 3: Add ginger and kaninfari (cloves) to it.
STEP 4: Use a blender to grind it if it is in small quantities. Resort to a commercial grinding machine if it is in large quantity.
STEP 5: Use a sieve to sieve it well.
Well, to save you all the stress, both the groundnut and guinea corn (paste or powered) have already been sold in the markets.
Having known all this, let’s get cooking!
How to Make Kunun Gyada (with Rice)
Ingredients
You will need the following ingredients to make Kunun Gyada with rice:
1 cup of roasted groundnut
Tamarind (tsamiya)
2 cups of powdered guinea corn, or the desired quantity if using the paste form.
Short-grain rice
Sugar
Procedure for Preparing Kunun Gyada (with Rice)
STEP 1: Soak the short-grain rice with hot water for 30 minutes and set aside.
STEP 2: Soak the tamarind (tsamiya) for 10 minutes with hot water and set aside. Then;
STEP 3: Get your powered guinea corn; pour water into it until it turns into something like a paste, but more watery. If you are using the one in paste, just add a little water and mix well. Set aside, too.
STEP 4: Get a clean bowl and pour in the roasted groundnut paste. Stir it gently, and it is properly mixed. Then add more water to it until it turns very watery for sieving ease.
NB: For the next 4 steps, ensure you have the exact quantity of Kunun Gyada that you want at the end of the day in the back of your mind, and consider that as you are ‘adding’.
STEP 5: Get a sieve and sieve it into a clean pot. You can repeat the sieving if you feel it is not smooth enough for you.
STEP 6: Put the pot over medium heat and add STEP 1 (soaked rice)
STEP 7: In the same pot, sieve STEP 2 (soaked tamarind). Then;
STEP 8: Allow the contents of the pot to boil. However, before it starts boiling, you need to be close to it to avoid spilling by stirring it regularly. Allow it to cook for 5 minutes.
STEP 9: Switch off the heat and allow it to cool for 5 minutes. This is very important, as it helps prevent lumps.
STEP 10: Now, get STEP 3 and add the content to the pot. Stir gently as you pour.
STEP 11: Tada! Your Kunun Gyada with rice is ready!
How to Make Kunun Gyada (without Rice)
Ingredients
Same with the ingredients used in making the one with rice except for the rice.
Procedure for Preparing Kunun Gyada (without Rice)
Repeat every step above, except that you will take out the steps that include rice.
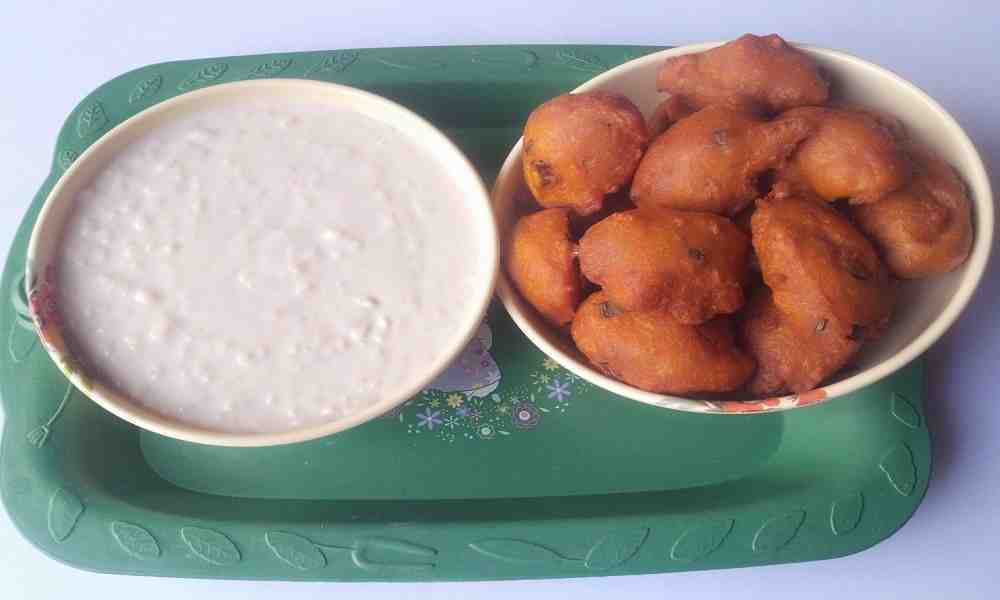
How to Serve Kunun Gyada
This recipe can be served with Kosai, Fried Yam, Fried Sweet Potato, Fried Irish Potato, bread, Kuli-Kuli (Groundnut Cake), Moi Moi and various types of snacks.
Don’t forget to serve hot, but not too hot.
Occasions to Serve Kunun Gyada
For the core Fulanis, most especially those in Adamawa and Gombe, this recipe is a meal for any day, any time, and any event. As such, it can be served in naming ceremonies, wedding ceremonies, condolence waits, Eids, special occasions, breakfast, lunch, dinner, etc.
How to Store Kunun Gyada
This delicacy can be stored in a food flask or any warmer of your choice. However, to avoid hardening the surface of the Kunu in your warmer, sprinkle a little water on top of the Kunu before closing.
Kunun Gyada lasts for 24 hours in its best form. It is also important to know that it cannot be stored in a refrigerator.
Nutritional Value of Kunun Gyada
The nutritional value of Kunun Gyada cannot be overemphasized, as it is a good source of vitamins and minerals such as vitamin E, Magnesium, Folate, Copper, and Arginine. Again, the protein-rich composition of the groundnut in Kunun Gyada makes it great for people who are either trying to lose weight or trying to gain muscle strength. It also improves brain functioning, reduces cholesterol, and so much more.
You could also check out 8 weight loss exercises you can do at home.
Conclusion
Avoid taking this delicacy while it is very hot. You could hurt yourself because of the groundnut in it, which helps retain heat. Now that you know how to make Kunun Gyada, I believe you have another choice among the choices that you have to make for meals, most especially breakfast. Tell me in the comments section when you will be making this change.
If you find this article helpful, please leave a comment in the comments section below.
You are always welcome to visit Northpad Nigeria for more local Northern Nigerian delicacies.
by Fatima Sani | Nov 13, 2021 | Local Delicacies
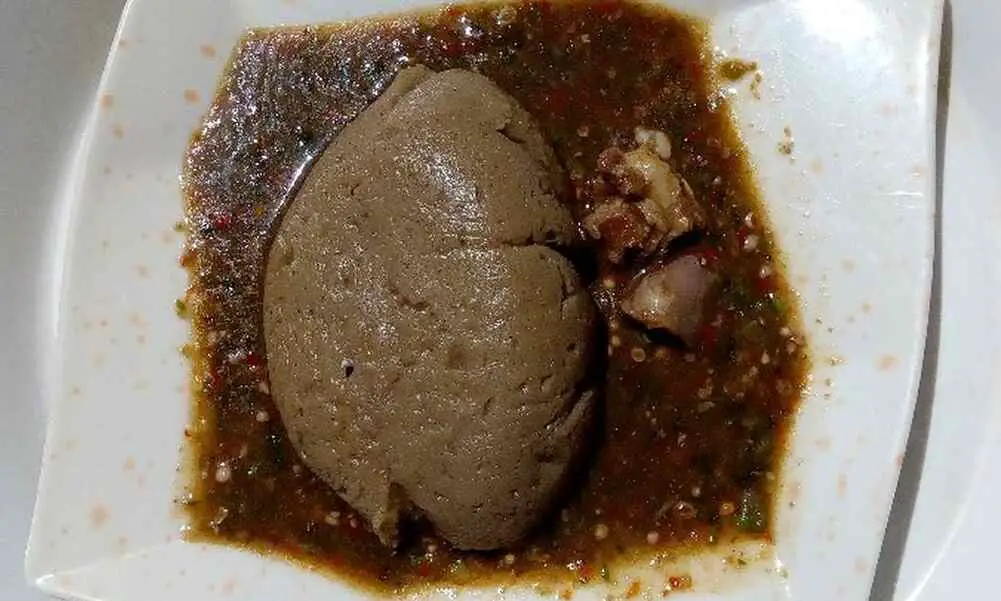
Tuwon Dawa specifically, is the least consumed of all the types of Tuwos that we have (Tuwon Shinkafa, Tuwon Alkama, Tuwon Masara, Tuwon Semo, etc.). It is usually dark brown, kind like Yoruba’s most decorated swallow – Amala. It is easy to prepare, just like Tuwon Masara and the procedure for its preparation is somewhat the same. This article seeks to teach you how to prepare Tuwon Dawa (yadda ake Tuwon Dawa) without much stress.
Permit me to go straight into it!
How to Prepare Tuwon Dawa
Equipment
Cooking pot
Wooding spatula
Bowl
Warmer
Leather
Ingredients for Making Tuwon Dawa
Ingredients needed to prepare this recipe are:
Guinea corn Flour
3 liters of water.
Procedure for Making Tuwon Dawa
STEP 1: Grind the guinea corn into flour and sieve it well. Ensure fine texture
STEP 2: In a clean bowl of cold water, pour a little guinea flour into it. Stir it well until perfectly mixed and in a watery state. (This is known as the talge).
STEP 3: Over medium heat, get a clean pot containing 3 liters of water on the fire and allow it to boil.
STEP 4: Pour the mixture in Step 2 into the boiling water. Stir properly until thick like pap.
STEP 5: Allow boiling for 5 minutes.
STEP 6: Add the guinea corn flour into the pot little by little as you stir. Continue to stir until desired thickness is achieved.
STEP 7: Reduce the heat of your cooker and allow it to steam for 5 minutes.
STEP 8: Mold your Tuwon Dawa into balls, put them in leather, and put them in a warmer.
Soup that Best Goes with Tuwon Dawa
The common soup that is usually taken with it traditionally is Miyan Kuka. In addition, it could also be taken with Miyan Kubewa (Okra soup) – fresh or dried Okro, Miyan Taushe, Miyan Karkashi, Miyan Wake, etc.
How to Serve Tuwon Dawa
It is best served hot.
Occasions to Serve Tuwon Dawa Best
It is best consumed as lunch and dinner. Sometimes, the surplus can be used as breakfast (as dumame). Dumame is the Hausa name for double-fire.
But it’s not advisable to serve during festive periods like Eids. It is also not advisable to serve on wedding ceremonies, naming ceremonies, birthdays, etc.
How to Store Tuwon Dawa
By warming it in the morning and evening, it could last for 2 days. However, if kept in a refrigerator, it could last for more days, although, its tastes could be affected. So, preferably, make just enough for consumption and probably for not more than 2 days.
However, just like Tuwon Semo, Tuwon Dawa is not interesting when warming it the traditional way (i.e. putting the molds in a pot containing water and allowing it to boil). The best way to warm it is by using a microwave.
Health Benefits of Tuwon Dawa
As humans, we need the energy to take care of our daily life struggles. As such, we need this northern Nigerian delicacy as it contains a high amount of carbohydrates.
However, it is not advisable for diabetic patients as it contains a high amount of starch. So diabetics should keep off, please.
Conclusion
As you have seen, Tuwon Dawa is very easy to prepare. It could even be prepared by an amateur cook – like children learning to cook. In addition to its importance, it tastes nice. Nonetheless, one of its setbacks to many is that it is not good-looking at all, I must say.
Personally, I prefer to take it in the evening. Now tell me, when do you intend to make this for yourself or your family?
If you find this article helpful, please leave a comment in the comments section below. Thank you.
You are always welcome to Northpad Nigeria for more local Northern Nigerian delicacies.
