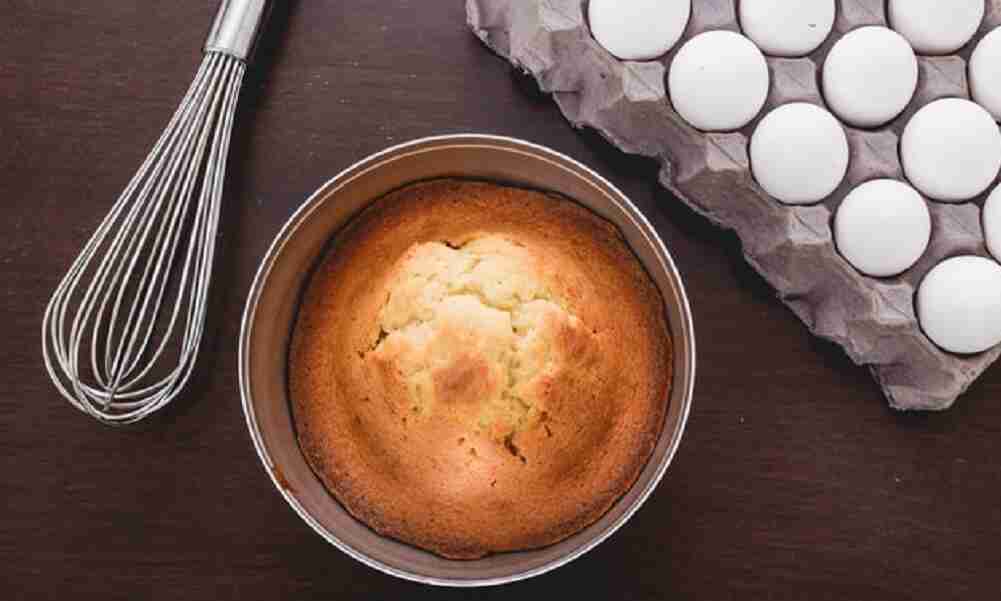
Sponge cake (or yellow cake) is a soft, spongy, and delicious cake with a brownish outer surface and a whitish inner surface. This is made with lots of eggs, sugar, and flour, and I’ll be walking you through the sponge cake recipe.
1 cup of flour 3 tablespoons of milk (optional) 3 tablespoons of oil 4 eggs ¼ cup of sugar ¼ cup of butter ½ tablespoon of vanilla essence
Procedures for Preparation of Sponge Cake
STEP 1: Crack your eggs and separate the yolks from the whites in different bowls.
STEP 2: Meanwhile, preheat the oven to 350F.
STEP 3: In your bowl of yolks, give this a whisk and add milk, oil, and vanilla essence.
STEP 4: Gradually sift the flour into the bowl and give it a stir. Mix until well incorporated and set this aside.
STEP 5: In the bowl of whites, using a hand mixer, beat for 20 minutes from medium to high until it begins to foam.
STEP 6: Add in sugar and continue beating till stiff peaks. Here, you see the egg whites looking thick, creamy, and white.
STEP 7: Now add this to the bowl of yolks. Fold it in and mix.
STEP 8: Get the clean baking pan. It’s time to bake this sponge cake recipe.
STEP 9: Grease the pan with butter and add parchment paper to the sides and bottom of the pan. You may also dust with flour after greasing.
STEP 10: Pour the batter into the prepared pan. Do not fill to the brim to avoid pouring while baking.
STEP 11: Bake for 25–30 minutes or until a toothpick comes out clean when inserted in the middle of the pan. Do not open the oven while baking.
STEP 12: Remove from the oven using a hand glove or mittens.
STEP 13: Allow it to cool for 5–10 minutes or place it on a rack for easy air ventilation.
STEP 14: Enjoy!
Recipes that Best Goes with It
Sponge cake goes with ice cream, milkshakes, and, of course, soft drinks like Coca-Cola, etc.
How to Serve Sponge Cakes
Sponge cake should be served to friends, loved ones, and family immediately as it cools off. You can also enjoy sponge cakes with these 3 different ways of making chocolate sauce.
Occasion to Serve Sponge Cakes Best
This delicious sponge cake recipe can be served any day, anytime, and anywhere. It could serve as a lunch box for kids, birthday parties, or after-party snacks.
Nutritional Value of Sponge Cakes
This snack is packed with benefits such as low calories when eaten, a good source of energy, and, of course, the unique flavors in your kitchen.
How to Store Sponge Cake
Store in the freezer for 2–3 days. I suggest you wrap before storing and also consume within a day. Enjoy!
Conclusion
Are you in the kitchen already? Whisk up this recipe and tell us how you made this soft, fluffy, spongy, and delicious sponge cake recipe. Be sure to let us know when you do in the comment section.
FAQs
Can I use butter or margarine for my sponge cake?
With margarine, you get a softer and more fluffy texture in cakes than with butter. Butter has a great taste and smell but it makes cake dense and dries out the moisture. Margarine should be your go-to when making this sponge cake.
What is the difference between regular cake and sponge cake?
A very good difference between regular cake and sponge cake is that the latter is made with lots of eggs, while the former contains baking powder or baking soda.
What is the difference between butter cake and sponge cake?
Butter cake relies on butter or margarine and some leavening agents such as baking powder and baking soda, whereas sponge cake relies on the beaten eggs and air that gets into it.
What are the four types of sponge cakes?
These are Swiss roll sponge, Devil’s Food Cake, Forrest sponge cake, Angel Food Cake, and many other types of sponge cakes.
What is the secret to sponge cake?
The secret to sponge cake is in its texture, the eggs, and the absence of leavening agents like baking soda and baking powder. In sponge cake, the leavening agents are in the eggs and the air is gotten from beating them using the mixer. Sponge cakes are soft, light, fluffy, and airy, and this is a result of beating egg whites.
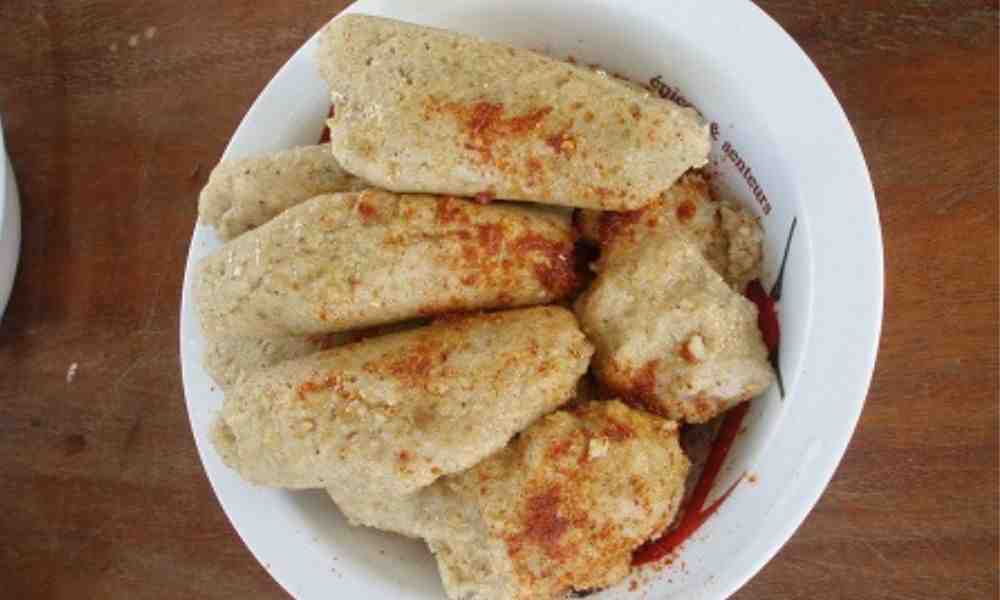
Tubani recipe is another northern Nigerian dish that is primarily consumed by Hausas. It is prepared using three (3) different methods, just like Gauda, as a result of the differences in the ingredients used.
It can be made with masara and waken soya (maize and soya beans); also, it can be made with white beans and maize alone. In this tutorial, I’ll show you how to prepare Tubani using three distinct methods. Please stick with me!
How to Make Tubani Recipe with Masara and Soya Beans
Ingredients
2 cups of maize 2 cups of soya beans 4 spoons of baobab leaf powder (Kuka) A small piece of potash (kanwa) Powdered pepper Vegetable, palm oil, or soup Maggi
Procedure for Preparing Tubani with Masara and Waken Soya
STEP 1: Remove the dirt from the maize and soya beans and thoroughly combine them. (In Hausa, the word cakudawa means mixing.’)
STEP 2: Grind or blend the ingredients until finely ground, then filter into a basin or container. Then,
STEP 3: Soak and set aside the potash.
STEP 4: Thoroughly combine the contents of STEP 2 with the kuka (Baobab leaf powder).
STEP 5: Pour the potash into the bowl and thoroughly mix it in.
STEP 6: Next, slowly drizzle in the water while mixing to make a dough that is neither too thick nor too thin.
STEP 7: Fetch the dough with your hand and mold it to the shape you want then set it aside.
STEP 8: Continue until all of the dough has been used up.
STEP 9: In a clean saucepan over medium heat, pour water, place the contents in STEP 7 in the pot, and cover the pot with the lid. Allow for 40 minutes of cooking time, just like Danwake.
STEP 10: Scoop the Tubani one by one after turning off the heat and put in a clean warmer.
STEP 11: Fry your oil for only 2 minutes (vegetable or palm oil).
STEP 12: Your Tubani with masara and wake is ready!
How to Make Tubani Recipe with Masara and White Beans (Farin Wake)
Ingredients
2 cups of beans 2 spoons of baobab leaf powder (Kuka) A small piece of potash (kanwa) Powdered pepper Vegetable or palm oil or soup Maggi
Procedure for Preparing Tubani with Wake (Beans)
STEP 1: Separate the beans from the dirt.
STEP 2: Fill a clean basin halfway with water and soak the beans for 10 minutes.
STEP 3: Rinse the beans thoroughly to remove the grain shafts.
STEP 4: Immediately after washing, blend or grind it to produce a thick dough.
STEP 5: Add the maggi into the dough and thoroughly mix.
STEP 6: Fetch the dough with your hand and mold it to the shape you want then set it aside. Repeat the same process until the entire dough is exhausted.
STEP 7: Over medium heat, get a clean pot, pour water into it, arrange the content in STEP 6 in the pot, and cover the lid of the pot. Allow to cook for 40 minutes just like Danwake.
STEP 8: After turning off the heat, scoop the Tubani one by one and place them in a clean warmer.
STEP 9: Fry your oil (vegetable or palm oil) for just 2 minutes.
STEP 10: Your Tubani with wake (beans) is ready!
How to Make Tubani Recipe with Masara (Maize)
Ingredients
Same with the ingredients for Tubani made from maize and soya beans
Procedure for Preparing Tubani with Masara (Maize)
The procedure is the same as that of Tubani made from Maize and soya beans except that in this case, no soya beans.
How to Serve TubaniRecipe
Tubani is usually served with Miyan Taushe, which is typically poured over the tubani. Powdered pepper, Maggi, and oil could be put on top of the Tubani before serving. Alternatively, you could simply place the Tubani on one plate and the oil, pepper, and maggi combined on another platter, and then consume the Tubani by dipping it in the second plate.
Occasions to Serve Tubani Recipe Best
Tubani is suitable for consumption at any time of the day. It could also be consumed as one of our three fundamental meals (breakfast, lunch, and dinner). When eaten as a dessert, it isn’t a bad idea.
How to Store TubaniRecipe
If you keep it submerged in water, it will last for 24 hours. When refrigerated, however, it will last 3 to 4 days.
Tubani recipe is a delicious northern Nigerian dish that is simple to cook, as you’ve seen above. You’ll get there if you properly follow the steps. I hope you found this article to be useful.
Anyway, that concludes this amazing meal. Make it for yourself or your family, and let us know how it goes in the comments area below.
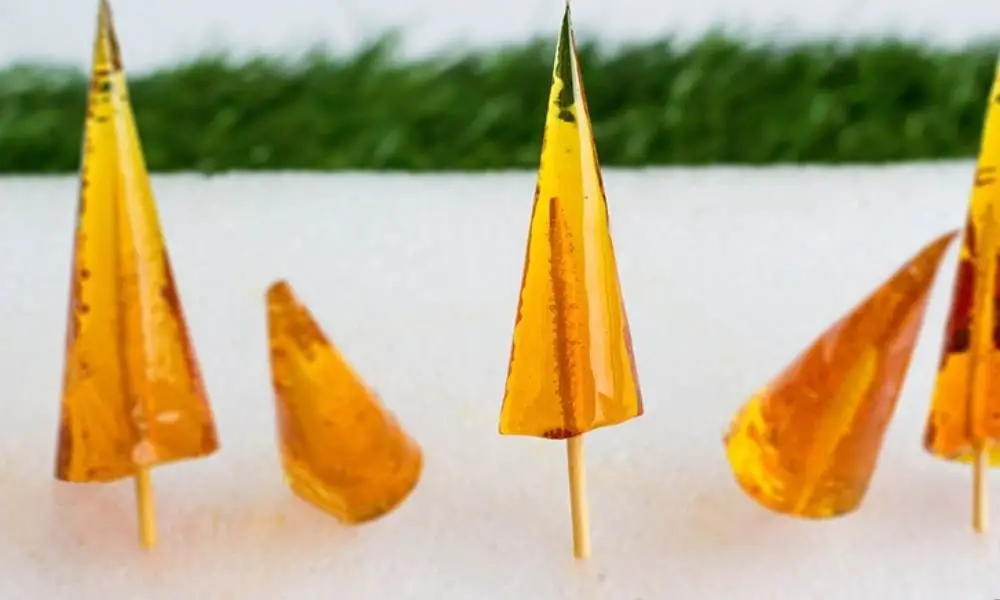
Hanjin Ligidi is a delicacy or cuisine that is primarily consumed by children. It’s a popular cuisine in northern Nigeria, particularly among the Hausas.
I recall drinking a lot of this as a kid, along with Charbin Malam, Dan Tamatsitsi, and other similar beverages. I still find it fascinating and amazing when I eat it from time to time to reminisce about the good old days.
If you use this piece as a reference, it will be quite simple to prepare.
STEP 1: Spread the tamarind (tsamiya) on a big surface, such as a tray, and dust off the tsamiya’s surface.
STEP 2: Wash the tamarind (tsamiya) thoroughly in a clean water bowl and drain.
STEP 3: Fill the bowl with water once again to soak the tamarind for 30 minutes. You might use hot water to speed up the soaking process and attain your goal in as little as 5 minutes.
STEP 4: Place a clean pot over medium heat and sieve the soaked tamarind into the pot. Allow it to come to a boil.
STEP 5: Pour in the sugar, stirring constantly as you pour. Carry on like this until the mixture becomes very thick.
STEP 6: Finally, add your flavoring to the pot’s contents and stir well.
STEP 7: Remove the pan from the heat, pour the contents of STEP 6 into your funnel-shaped paper, and put a toothpick in it. Repeat this procedure till all Hanjin Ligidi have been used up.
STEP 8: Set aside 10 minutes to cool.
STEP 9: Your Hangin Ligidi is ready for consumption.
How to Serve Hanjin Ligidi
It is served the way snacks are served. To consume it, you will have to peel the paper off the Hanjin Ligidi, hold the toothpick with your thumb and index finger, and lick. Oh, my God, I’m salivating already.
Occasions to Serve Hanjin Ligidi Best
This recipe is suitable for consumption at any time of day. You know how kids are: they’ll eat anything at any moment.
How to Store Hanjin Ligidi
It can last for months without being refrigerated if kept in a secure location away from children and rodents.
½ cup of unsalted butter ½ cup of granulated sugar 1 egg 1 teaspoon of salt ¾ cup of brown sugar 1 teaspoon of vanilla extract 1 cup of chocolate chips or dark chocolate ½ tablespoon of baking soda 1 ¼ cup of flour
Procedures for Preparing Chocolate Chip Cookies
STEP 1: Preheat the oven to 375 degrees.
STEP 2: Line baking sheets with parchment (or baking paper).
STEP 3: In a bowl, add the dry ingredients (flour, baking soda, and salt)
STEP 4: In a different bowl, add butter and sugar.
STEP 5: Beat this using an electric mixer till soft, light, creamy and fluffy. Beat for 5-7 minutes.
STEP 6: You can also use your hand for this. Use a paddling stick to get the creamy and light texture.
STEP 7: Add in eggs one at a time as you continue mixing on low speed.
STEP 8: Add in vanilla extract and give this a mix. Now, do away with your mixer if you’re using one.
STEP 9: Now, add in the flour mixture and use a spatula or paddling stick to mix until blended.
STEP 10: Add in the chocolate chips or dark chocolates and fold them in by mixing.
STEP 11: Using an ice-cream scoop or a 2/3 measuring cup, scoop out the mixture onto parchment paper.
STEP 12: Place them 2-3 inches apart as you continue.
STEP 13: Using your hands, slightly give it a round shape. Place the baking pan with the cookie dough in the fridge for 30 minutes to an hour to allow cool a little.
STEP 14: Bake until golden brown for 8-12 minutes.
STEP 15: Remove from the sheets and allow to cool for 20 minutes.
STEP 16: After cooling, you can serve and enjoy. Tada! You just made the best chocolate chip cookies recipe out there!
These cookies can be enjoyed over tea or milk for breakfast or simply enjoyed among friends and family. It can also be eaten for lunch or as a late-night snack with loved ones and couple goals.
Occasions to Serve Chocolate Chip Cookies
These cookies are go-to for a lazy afternoon, lunch with friends and family. It can also be enjoyed for Christmas with loved ones and among married couples or couples in general. Enjoy a cozy day with them.
How to Store Chocolate Chip Cookies
Chocolate chip recipes should be stored in an airtight container and kept in the fridge.
Nutritional Value of Chocolate Chip Cookies
The nutritional benefits of these cookies recipe can be seen in high caloriesand carbohydrates as it provides you with energy because of the sugar.
Conclusion
Who can say No to these when they are the best chocolate chip cookies recipe out there? They are sweet, chewy and just a chip would not be enough. Bake some more and when you do, let us know in the comment section below.
FAQs
Can I melt my butter?
Yes, you can. Melting the butter gives it a chewy and smooth texture. Here’s how you can make this recipe if you choose to melt your butter. Start by mixing your wet ingredients (eggs, melted butter, vanilla extract) and pouring them into your dry ingredients (flour, baking soda, sugar, and salt). Give this a whisk and then add in chocolate chips. Adding melted butter to these best chocolate chips recipes gives it a chewy texture.
Can I use dark chocolates instead of chocolate chips?
Yes, you can. Be sure to break the chocolates to your desired size and shape. You can also add in chocolate chips for added sweetness and chocolate taste. I mean, the more it is, the sweeter it will be.
I don’t have an electric mixer. Can I still make this chocolate chip cookies recipe?
You’re in luck! You can enjoy this best chocolate chips cookie recipe without an electric mixer; you just have to put your hand to the whisk to whip up this recipe.
Can I use only granulated sugar?
Yes, you can. But brown sugar gives it that chewy texture.
Should I chill my dough before baking?
Yes, this results in thicker dough, chewy, and softer insides.
Miyan Lalo recipe/Miyar Lalo also known as Jute Leave Soup or Ewedu Soup in English language is a delicacy specifically consumed in the Northern part of Nigeria and specifically among the Hausa ethnic groups. It is easy to make, tastes good when prepared well, and is enjoyed by a lot of people. This article seeks to teach you how to prepare Miyan Lalo (yadda ake Miyar Lalo)
What are we waiting for? Let’s get started with the ingredients needed to make this sumptuous soup first.
Ingredients
2 bunches of Lalo leaves (Jute leaves) Fresh pepper, onions, garlic, and ginger Meat Seasoning cubes and salt to taste A little potash (kanwa) 2 medium locust beans (daddawa) 3 cups of water 1 cup of palm oil (optional)
Procedure for Preparing Miyan Lalo
STEP 1: Grate or grind your fresh pepper and onions and set them aside.
STEP 2: Pound the locust bean (daddawa) into a fine powder and set it aside as well.
STEP 3: Wash your Lalo leaves properly and cut them into small pieces and set them aside as well.
STEP 4: Wash the meat and put them in a pot over medium heat. Add your grated onions, ginger, and garlic to it. Also, add your seasonings to it and add water. Cover the pot with its lid and allow 30 minutes of cooking time.
STEP 5: Add the grinded daddawa (powdered locust bean) and seasoning cubes with salt to taste too. Cover to cook for 25 minutes.
STEP 6: By now, your meat is well-cooked and soft, Good! Now add the Lalo leaves, then a little potash (kanwa), and a little palm oil (which is optional) to the cooking pot. Allow to simmer for 10 minutes.
STEP 7: Tada! Your Miyan Lalo is ready for consumption.
Miyan Lalo is best served hot with a glass of chilled water or your favourite beverage. Interestingly, you could even take it alone.
Occasions to Serve Miyan Lalo Best
It can be taken as any of the 3 basic daily meals (breakfast, lunch, and dinner) but preferably, lunch and dinner when it’s fresh. When it is the remnant of the previous day, you could take it as breakfast in form of dumame (double fire)
How to Store Miyan Lalo
When refrigerated with a constant power supply, it can last for days. However, in the absence of a refrigerator, you could warm it morning and evenings. Doing so will make it last a few more days compared to when refrigerated. To avoid all of these and for convenience, you could just make just enough for the present need.
Furthermore, it appears to contain larger levels of the above vitamins and minerals. This is due to the fact that a cooked cup of jute leaves contains almost three times the amount of leaves.
Conclusion
If you carefully follow the above procedures carefully, you should be able to arrive at the actual Miyar Lalo recipe you intend to have. As you have seen, it isn’t difficult at all. All you need to do is make up your mind and try it. When you do, share with us your experience in the comments section.
If you find this article helpful, please leave a comment in the comments section below as well.