As the name implies in Hausa, Kunun Gyada is derived from Kunu (meaning pap) and Gyada (meaning groundnut); when you put the two words together, you will have Kunu Gyada, meaning Groundnut Pap. It is a pap that is very popular in northern Nigeria, most especially among the Fulanis, whom you cannot wait to add to your meals, especially breakfast, although Hausas are beginning to embrace the consumption of this recipe too.
There are two ways to prepare the Kunun Gyada: one with rice and one without. In this article, I will take you through the process of making the two. There are two major ingredients for preparing Kunun Gyada that need processing before usage: groundnut and guinea corn. It is paramount that you know how to go about processing the two. Let’s see how:
How to Process the Groundnut for Kunun Gyada
STEP 1: Get your groundnut (preferably the one with the red back because it contains less oil) and pick the dirt from it.
STEP 2: Over high heat, put a frying pan (the size of the frying pan should depend on the quantity of groundnut) and pour sharp sand (sandy soil) into it. Then;
STEP 3: When the sand gets very hot, pour in your groundnut and stir at regular intervals—say, 5 seconds of waiting time in between stirs. Roast for 20 minutes
STEP 4: When roasted, put the frying pan down and spread on a hard surface so as to cool faster.
STEP 5: Pick out the groundnut from the sandy soil. Then;
STEP 6: Peel the back of the groundnut.
STEP 7: If the groundnut isn’t much, you can use a blender by adding a little water to it and blending until it turns into a paste. However, if it is in large quantity, take it to a commercial grinding machine.
How to Process the Guinea Corn for Kunun Gyada
For the guinea corn, well, there are two ways you can have it: either in powdered form or in the form of a paste. For the one in paste form:
STEP 1: Pick the dirt from the guinea corn and wash it well.
STEP 2: Soak in water for 6 hours. You could do that overnight if you intend to make it in the morning.
STEP 3: By now, the grains are already soft. Good.
STEP 4: Wash the grain again and add ginger and kaninfari (cloves).
STEP 5: If it is in small quantity, you can use a blender. Blend it until it turns to paste. If it is a large quantity, I will advise you to take it to a commercial grinding machine.
For the powdered form:
STEP 1: Pick the dirt from the guinea corn and wash it well.
STEP 2: After washing, drain it well and spread it on a mat outside to dry. Then;
STEP 3: Add ginger and kaninfari (cloves) to it.
STEP 4: Use a blender to grind it if it is in small quantities. Resort to a commercial grinding machine if it is in large quantity.
STEP 5: Use a sieve to sieve it well.
Well, to save you all the stress, both the groundnut and guinea corn (paste or powered) have already been sold in the markets.
Having known all this, let’s get cooking!
How to Make Kunun Gyada (with Rice)
Ingredients
You will need the following ingredients to make Kunun Gyada with rice:
1 cup of roasted groundnut
Tamarind (tsamiya)
2 cups of powdered guinea corn, or the desired quantity if using the paste form.
Short-grain rice
Sugar
Procedure for Preparing Kunun Gyada (with Rice)
STEP 1: Soak the short-grain rice with hot water for 30 minutes and set aside.
STEP 2: Soak the tamarind (tsamiya) for 10 minutes with hot water and set aside. Then;
STEP 3: Get your powered guinea corn; pour water into it until it turns into something like a paste, but more watery. If you are using the one in paste, just add a little water and mix well. Set aside, too.
STEP 4: Get a clean bowl and pour in the roasted groundnut paste. Stir it gently, and it is properly mixed. Then add more water to it until it turns very watery for sieving ease.
NB: For the next 4 steps, ensure you have the exact quantity of Kunun Gyada that you want at the end of the day in the back of your mind, and consider that as you are ‘adding’.
STEP 5: Get a sieve and sieve it into a clean pot. You can repeat the sieving if you feel it is not smooth enough for you.
STEP 6: Put the pot over medium heat and add STEP 1 (soaked rice)
STEP 7: In the same pot, sieve STEP 2 (soaked tamarind). Then;
STEP 8: Allow the contents of the pot to boil. However, before it starts boiling, you need to be close to it to avoid spilling by stirring it regularly. Allow it to cook for 5 minutes.
STEP 9: Switch off the heat and allow it to cool for 5 minutes. This is very important, as it helps prevent lumps.
STEP 10: Now, get STEP 3 and add the content to the pot. Stir gently as you pour.
STEP 11: Tada! Your Kunun Gyada with rice is ready!
How to Make Kunun Gyada (without Rice)
Ingredients
Same with the ingredients used in making the one with rice except for the rice.
Procedure for Preparing Kunun Gyada (without Rice)
Repeat every step above, except that you will take out the steps that include rice.
How to Serve Kunun Gyada
This recipe can be served with Kosai, Fried Yam, Fried Sweet Potato, Fried Irish Potato, bread, Kuli-Kuli (Groundnut Cake), Moi Moi and various types of snacks.
Don’t forget to serve hot, but not too hot.
Occasions to Serve Kunun Gyada
For the core Fulanis, most especially those in Adamawa and Gombe, this recipe is a meal for any day, any time, and any event. As such, it can be served in naming ceremonies, wedding ceremonies, condolence waits, Eids, special occasions, breakfast, lunch, dinner, etc.
How to Store Kunun Gyada
This delicacy can be stored in a food flask or any warmer of your choice. However, to avoid hardening the surface of the Kunu in your warmer, sprinkle a little water on top of the Kunu before closing.
Kunun Gyada lasts for 24 hours in its best form. It is also important to know that it cannot be stored in a refrigerator.
Avoid taking this delicacy while it is very hot. You could hurt yourself because of the groundnut in it, which helps retain heat. Now that you know how to make Kunun Gyada, I believe you have another choice among the choices that you have to make for meals, most especially breakfast. Tell me in the comments section when you will be making this change.
If you find this article helpful, please leave a comment in the comments section below.
Moi Moi, (Beans Cake in English) also pronounced and spelled as Moin Moin is delicious, soft, fluffy and a must to try. It is called Alale or Alala by the Hausas, Olele/Elele by the Igbo and remains Moi Moi in the mouths of Yorubas. This meal can be prepared with beans and selected spices. It is then cooked in aluminum foil, leaves, bowls, ramekins, nylons, and tins. Let me show you how to prepare Moi Moi. Let’s go!
Ingredients for MoiMoi
2 cups of big or small beans 5 tbsp of ground crayfish 5 seasoning cubes Curry (optional) Pepper 2 big onions 2 tbsp palm oil Red bell pepper 3 eggs (optional) Smoked fish or sardine (optional) Salt to taste
Before we dive into the steps on how to prepare moi moi, let us look at the equipment we need.
STEP 1: Before anything, pick the beans to remove any dirt or stones from them.
STEP 2: After this, soak the beans with water in a medium bowl for 30–45 minutes. Some people soak their beans overnight; either way is fine.
STEP 3: Wash the beans by scrubbing them together with your palms. Here, you are creating friction between your palms so as to remove seed coats from the beans.
STEP 4: Ensure all coats are removed. Strain this water, using a strainer, into another bowl. Repeat this process until the seed coats are completely separated from the beans.
STEP 5: Rinse and wash one last time before transferring to a bowl.
STEP 6: Now, wash the onions, pepper, and red bell pepper. Remove the seeds from the red bell pepper here.
STEP 7: Add this to the beans. You may either take this to blend at the market or use a good blender at home to grind the beans to a smooth paste.
STEP 8: If you’re blending at home, add in a little water to help it grind better to a smooth paste without lumps or any difficulty.
STEP 9: Now, that’s the first step on how to prepare Moi Moi. Let’s take a step further.
STEP 10: Choose what garnishing you want here:
Eggs? Boil the eggs for 12–15 minutes. After this, remove the shells and slice them into smaller pieces of the desired size.
Fish? Boil the fish or simply buy smoked fish. Debone the fish and cut it into pieces. Set aside.
Sardine? Take the fish out of the can and set it aside.
Spring onions? Give this a wash and a nice cut. Set aside.
STEP 11: Choose what method of cooking you’d like to use to prepare this Moi Moi.
Nylon? Open them and set them aside. It’s advised that you double the nylon so as to avoid the Moi Moi from bursting open. This makes your pot messy and requires extra time for cleaning. Simply open a nylon and insert it into another nylon. This way, you’re doubling the nylon.
Tin? Grease the tin with oil and set it aside.
Aluminum foil? Grease the foil with butter or oil and set it close to you. Preheat the oven because you’ll be baking if you choose this method. Now, let’s take the next step.
STEP 12: Pour the ground paste into a bowl and stir it for at least 10 minutes. Then;
STEP 13: Slowly add in some water and continue stirring till you get a smooth texture.
STEP 14: Avoid pouring too much water to avoid ending up with a watery mixture. Moi Moi has to be slightly thick and watery. Take caution here; it has to be almost watery but not WATERY.
STEP 15: Add in palm oil or groundnut oil and give this a stir. If you’re on a healthy diet, you can use olive oil.
STEP 16: For the seasoning cubes, you should melt them in hot water to avoid eating undissolved seasoning. Use a little water for this.
STEP 17: Add salt to taste. Go easy on the salt, okay? Too much can ruin the whole meal.
STEP 18: Give this a mix again. Add in curry if you want to.
STEP 19: Add in the ground crayfish. Now add in your preferred garnishing and give it a final mix. Like a DJ, yeah? Dissssh disssh dissssh, okay? Let’s continue.
STEP 20: Add water to a pot on medium heat and leave to boil.
STEP 21: Have you decided on the method you want to use to prepare Moi Moi? Yes?
STEP 22: Now, use a ladle to scoop out the mixture into your choice of cooking until the content is finished in the bowl.
STEP 23: In each, add fish or eggs. If you’re using nylon, tie the tip, and if aluminum, seal it tight.
STEP 24: Is your water boiling or hot enough? Yes? Now add the wrapped Moi Moi to the pot containing water.
STEP 25: If you’re using tin, just place them carefully on the pot containing water.
STEP 26: Allow to steam cook for 45 minutes to an hour. Then;
STEP 27: As the Moi Moi cooks, watch the water level, and if it begins to dry up, add water to the pot to keep it from burning.
STEP 28: To check if you’re done, insert a toothpick into one, and if it comes out clean, you’re good to go. You can simply work with time or, better yet, have a taste of your soft and delicious Moi Moi.
STEP 29: When certain, take out the Moi Moi from the water and leave it to cool down.
STEP 30: Unwrap the Moi Moi and serve on a plate. Enjoy!
Recipes That Best Goes With Moi Moi
Moi moi is best eaten with rice recipes.
How to Best Serve Moi Moi
Moi moi is a versatile dish and can be served alongside Jollof Rice and Fried Rice. Because of its versatility, it can also be eaten with Garri, Pap, Custard, Koko (Pap), peppered sauce, and fish. This is why you need to know how to prepare moi moi. With Moi Moi, you can’t go wrong.
Occasions to Serve Best
Moi moi can be served at parties for lunch, dinner, and special occasions.
Nutritional Benefits of Moi Moi
This delicious delicacy is highly rich in proteins and other macronutrients that play an important role in our bodies. Beans are rich in protein, and when cooked with eggs or fish, they help enrich them.
In addition, Moi Moi also helps in promoting bowel movements (visiting the toilet) due to its fiber content, but this also helps in reducing constipation.
How to Reheat, Preserve, and Store Moi Moi
Moi moi can simply be heated the following day by heating water and allowing it to boil for at least 30 minutes. It can also be stored in the refrigerator for at least 2–3 days for longevity while still retaining its taste.
Conclusion
I know the next time you hear of this delicacy, you’ll beat your chest because you now know how to prepare Moi Moi. In addition, Moi Moi can be enjoyed with any Nigerian rice recipe with a chilled drink and, of course, with friends and family.
Making moi moi for sale requires the same procedure as the one you would make for your family. To know how to prepare moi moi for purchase, you have to take note of your target market when considering the ingredients, packaging, and quality of the moi moi.
What makes moi moi too soft?
There are a variety of reasons why your moi moi may be too soft. This could either be because you soaked the beans for too long, used tomato puree, or added too much water.
What beans is best for moi moi?
Honey beans are best for making moi moi.
What can I use to mold my Moi Moi?
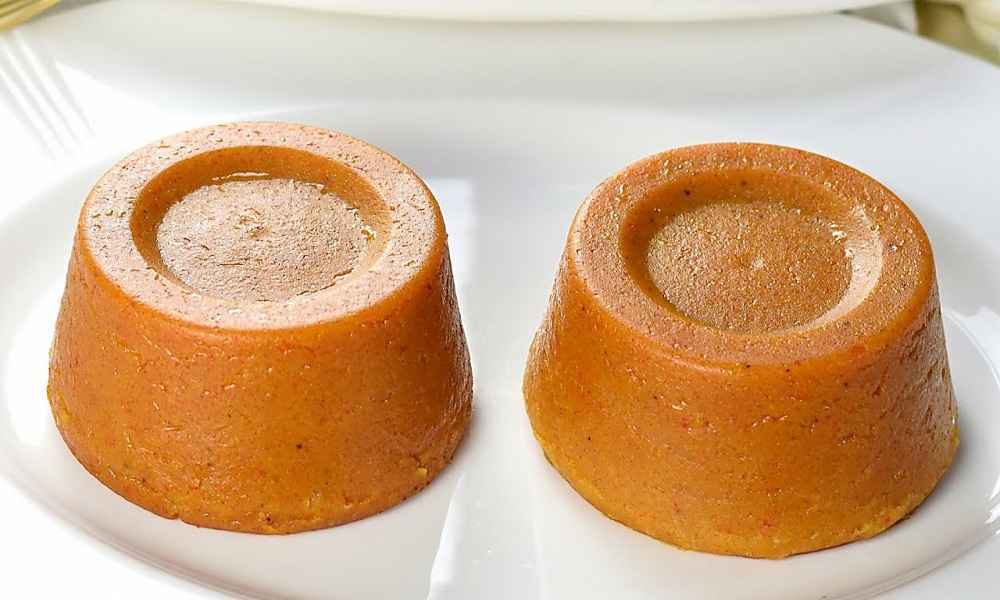
Moi Moi will take the shape of any container you use. You can use leaves, nylon, tins, and ramekins to mold your moi moi.
Can I make moi moi without peeling the beans?
Yes, you can. We eat beans without peeling the back, so it is possible to make moi moi without peeling the beans. It is important to note that when making moi moi with unpeeled beans, it is best to use brown or honey beans.
What can I use instead of Moi Moi Leaf?
You can use Nylon, Tins, Ramekins, pouches, Muffin pans, etc.
Can I use nylon for my moi moi?
Sure. Moi Moi can be prepared with nylon. To avoid busting, double the nylon. This way, the second nylon serves as a layer of insurance and prevents the moi moi from spilling into the pot.