by Aisha Zakari | May 1, 2022 | Food & Kitchen
Eid is approaching! Eid means “festive” in Arabic. There are two parts to Eid: Eid ul Fitr, which marks the end of the holy month of Ramadan, our fasting month. We also call it “Small Sallah”, and Eid ul Kabeer, which marks the historical event of the sacrifice of our Prophet Ibrahim (A.S) and the sacrificial lamb. We call it “Big Sallah,” and that’s why meat is in abundance too. Along with the meat, there are a lot of recipes you can cook on Eid too.
It’s that blessed festival we Muslims all around the world come to celebrate by bringing friends and family together in joy, happiness, harmony, and festivity. Food is necessary and the most important part of this festival. In Nigeria, most households consume rice during this festive period. In this article, which I hope will come in handy, I’ll be sharing with you recipes you can make at home apart from rice that will be delicious.
You should spice things up in your household this Eid. Let’s get spicy!
Foods to Cook on Eid
1. Pounded Yam and Egusi Soup
This is one of the recipes you can cook on Eid. It’s my mom’s favorite, and it’s prepared when she wants to ditch the same old rice when she’s in the mood to spice things up for Eid. This is her go-to always. I mean, why not? Pounded yam is filling and satisfying, and when dipped in egusi, it makes the celebration just right and delicious.
We like to pound our yams using a mortar and pestle. However, with advancements now, there are blenders for pounding yam and also processed yam flour (pounded yam), but mortar and pestle remain in my household.
2. Amala and Ewedu Soup
This is basically a Yoruba delicacy that is eaten with stew. This Ewedu is mixed with stew to enrich it and make it edible too. This is my very own favorite.
I like to eat my Amala with Ewedu soup but you can eat it with Egusi, vegetables,, or Efo Riro.
3. Mouth Watering Goat Meat – Pepper Soup
Eid is always complete with this bowl of assorted meat – be it goat meat, chicken meat, or ram meat. This is surely one of the recipes you can cook on Eid.
4. Ram & Yam Porridge
Is there still leftover yam from the pounded yam? Why not make this recipe for friends and family? They will definitely enjoy it.
Add in ram meat to give this dish a sweet, delicious, and festive moment.
This dish is delicious and tasty; you can substitute the yam for potatoes. You could make it watery and add pepper soup spice so you can drink the water and have the same feeling as devouring pepper soup.
Savor the moment, right?
5. Peppered Meat
Pepper Meat is one of the recipes you can cook on Eid. This could be eaten as a whole or pierced through skewers with green bell pepper and onions.
Any way you choose to eat, it’s fine honestly.
6. Vanilla Cupcakes
I mean, what’s Eid without snacks to give to friends and family? It’s even extra chops for us as we have varieties to select from – samosa to spring rolls to doughnuts and then cupcakes.
This is one of the recipes you can cook on Eid.
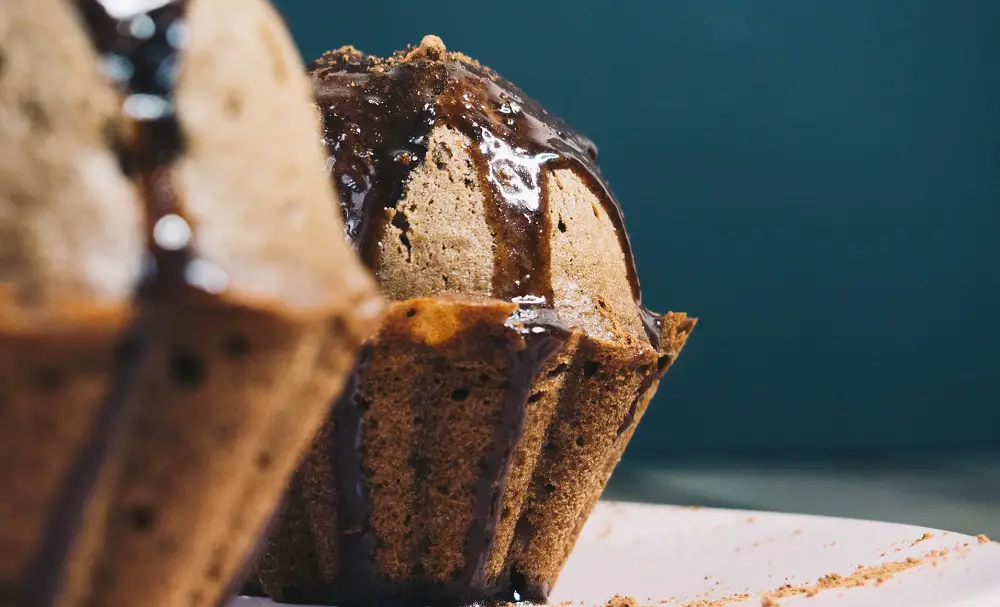
7. Chocolate Cupcakes
The chocolate cupcake is simply cupcakes but we’ll be adding cocoa powder or chocolate bars and sometimes both into the batter. If you have chocolate bars, add this to the batter and bake. You’ll get the twist in your mouth when the chocolate melts.
Remember, you can add chocolate bars into the batter – it makes the cupcake richer in taste too.
8. Zobo Drink
What’s Eid without drinks, right? I mean, what’s any festive occasion without a drink? There are other drinks like Kunun Aya, or Kunun Gyada to try.
Conclusion
Eid is that time of the month when friends and family come together from afar to catch up and have a good time. In order to do this, different dishes are served to enjoy each other’s company as we jolly dey go with the dishes.
I hope this article has informed you that there are so many dishes to prepare for Eid apart from rice. Tell me in the comments section the one or ones you will be trying out this coming Sallah.
Eid Mubarak once again! Taqabballahu minna wa minkum!!

by Aisha Zakari | Apr 17, 2022 | Food & Kitchen
Are you craving something sweet and chewy for the weekend? Well, here is the best chocolate chip cookie recipe to try.
These cookies are sweet, chewy, delicious, and so chocolatey to munch on and crunch on. Here’s how to make it:
Equipment for Making Chocolate Chip Cookies
Ingredients
½ cup of unsalted butter
½ cup of granulated sugar
1 egg
1 teaspoon of salt
¾ cup of brown sugar
1 teaspoon of vanilla extract
1 cup of chocolate chips or dark chocolate
½ tablespoon of baking soda
1 ¼ cup of flour
Procedures for Preparing Chocolate Chip Cookies
STEP 1: Preheat the oven to 375 degrees.
STEP 2: Line baking sheets with parchment (or baking paper).
STEP 3: In a bowl, add the dry ingredients (flour, baking soda, and salt)
STEP 4: In a different bowl, add butter and sugar.
STEP 5: Beat this using an electric mixer till soft, light, creamy and fluffy. Beat for 5-7 minutes.
STEP 6: You can also use your hand for this. Use a paddling stick to get the creamy and light texture.
STEP 7: Add in eggs one at a time as you continue mixing on low speed.
STEP 8: Add in vanilla extract and give this a mix. Now, do away with your mixer if you’re using one.
STEP 9: Now, add in the flour mixture and use a spatula or paddling stick to mix until blended.
STEP 10: Add in the chocolate chips or dark chocolates and fold them in by mixing.
STEP 11: Using an ice-cream scoop or a 2/3 measuring cup, scoop out the mixture onto parchment paper.
STEP 12: Place them 2-3 inches apart as you continue.
STEP 13: Using your hands, slightly give it a round shape. Place the baking pan with the cookie dough in the fridge for 30 minutes to an hour to allow cool a little.
STEP 14: Bake until golden brown for 8-12 minutes.
STEP 15: Remove from the sheets and allow to cool for 20 minutes.
STEP 16: After cooling, you can serve and enjoy. Tada! You just made the best chocolate chip cookies recipe out there!
Check out: A Step-By-Step Guide on How to Make Dulce De Leche at Home
How to Serve Chocolate Chip Cookies
These cookies can be enjoyed over tea or milk for breakfast or simply enjoyed among friends and family. It can also be eaten for lunch or as a late-night snack with loved ones and couple goals.
Occasions to Serve Chocolate Chip Cookies
These cookies are go-to for a lazy afternoon, lunch with friends and family. It can also be enjoyed for Christmas with loved ones and among married couples or couples in general. Enjoy a cozy day with them.
How to Store Chocolate Chip Cookies
Chocolate chip recipes should be stored in an airtight container and kept in the fridge.
Nutritional Value of Chocolate Chip Cookies
The nutritional benefits of these cookies recipe can be seen in high calories and carbohydrates as it provides you with energy because of the sugar.
Conclusion
Who can say No to these when they are the best chocolate chip cookies recipe out there? They are sweet, chewy and just a chip would not be enough. Bake some more and when you do, let us know in the comment section below.
FAQs
Can I melt my butter?
Yes, you can. Melting the butter gives it a chewy and smooth texture. Here’s how you can make this recipe if you choose to melt your butter. Start by mixing your wet ingredients (eggs, melted butter, vanilla extract) and pouring them into your dry ingredients (flour, baking soda, sugar, and salt). Give this a whisk and then add in chocolate chips. Adding melted butter to these best chocolate chips recipes gives it a chewy texture.
Can I use dark chocolates instead of chocolate chips?
Yes, you can. Be sure to break the chocolates to your desired size and shape. You can also add in chocolate chips for added sweetness and chocolate taste. I mean, the more it is, the sweeter it will be.
I don’t have an electric mixer. Can I still make this chocolate chip cookies recipe?
You’re in luck! You can enjoy this best chocolate chips cookie recipe without an electric mixer; you just have to put your hand to the whisk to whip up this recipe.
Can I use only granulated sugar?
Yes, you can. But brown sugar gives it that chewy texture.
Should I chill my dough before baking?
Yes, this results in thicker dough, chewy, and softer insides.

by Aisha Zakari | Apr 15, 2022 | Beauty & Fashion
Want to say goodbye to dry and chapped lips and say hello to soft and luscious lips? Want to do something fun and easy? You’re in the right place because, in this article, I’m about to put you through how to make your homemade recipe for lavender lip balm.
Follow these steps to make your moisturizing homemade lip balm, be sure to gift it to friends and loved ones.
But first…
What is a Lip Balm?
A lip balm is a substance that is added to the lips to moisturize and relieve from chaps and dryness. A lip balm is generally made from a base mostly coconut oil or beeswax, vitamin E capsules for moisturizing effect, flavour and colour. Just like that, you have a go-to for soft and luscious lips!
All you need are;
- Small containers or tubes
- Glass bowl to mix
- A stirrer or a spoon
- Essential oils (coconut, almond, etc)
Now, that you know the basics of the recipe for your homemade lavender lip balm, let’s get to something interesting to further educate you.
Benefits of Lavender
Lavender is a flowering plant in the mint family that’s easily identified by its sweet floral scent. It has the following benefits;
- Dropping a few drops of lavender oil on your pillow before going to sleep at night has been confirmed to improve sleep and make you sleep quickly.
- Lavender can help cure pain as it is an important pain reliever because the oil contains linalyl acetate and linalool — anti-inflammatory components that are found in many essential oils.
- Because of the anti-inflammatory effects of lavender, it may also have a significant effect in improving respiratory health including helping people with asthma.
- Lavender could also serve as a hair growth promoting agent, though that hasn’t been proven scientifically yet.
Now enough said, you have learnt all about the benefits of lavender, let’s get right to how to make the lavender lip balm.
Lavender Lip Balm Recipe
Ingredients You Need to Make Lavender Lip Balm
- 2tbsp Coconut oil
- 2tsp Beeswax (crushed)
- 1/2 tsp Raw honey
- 2tbsp Almond oil
- Lavender oil
Procedure
- On medium heat, bring a pot of water to a boil.
- Insert a glass bowl into this pot. Make sure it doesn’t tilt and fall, you can hold the glass bowl with a tong. It’d only for a minute.
- Add in crushed beeswax and allow to melt completely for at least 20-30 seconds.
- Add in coconut oil and almond oil. Give this a stir and remove the bowl from the pot.
- Now, add in honey and add 20-30 drops of lavender oil. Allow to cool down.
- Pour this into a small container or a tube and allow to set in.
- Cover with the lid and Voila!
Note: Ensure the container or tube is clean before transferring so as to avoid contamination of any sort.
How do You Store Lavender Lip Balm?
Store in a cool dry place, this helps in solidifying it. You can also refrigerate it for an hour or two to speed the solidification process but after that, do not refrigerate as this could lose its form and potentials.
FAQs about Lavender Lip Balm
Q: What can I use instead of Lavender oil?
A: Shea butter is a good recipe for homemade lips balm. You can also substitute shea butter for coconut oil if you have it in store.
Q: I don’t have beeswax, what do I use?
A: Relax! You can go ahead and make your homemade lip balm without having to use beeswax. Beeswax is like a solidifier so you can go ahead to use coconut oil, shea butter or castor oil as a base. You can get your authentic beeswax online.
Q: Can I use a container instead of a tube?
A: As I said above, you can use a container or you use a tube lying around in the house. This is used as storage and anything you have available can be used. Make sure it has a cover so as to prevent contamination such as dust and dirt.
Q: How long will my homemade lavender lip balm last?
A: Your homemade lip balm should last up to 2-3 months depending on the quantity you make and on your daily usage.
Q: Does lip balm lighten my lips?
A: Homemade lip balm does not lighten lips but helps in moisturizing. If you want a lighter lip, you could use lemon or lemon oil. Lemon has been proven to be effective in lightening the lips and of course, the skin.
Another option is to scrub your lips at least once. Follow this link to make your own lip scrub: http://34.249.48.236/how-to-make-your-homemade-lip-scrub-for-your-pink-lip-in-5-minutes/
Q: How long does it take to solidify?
A: This should take at least 15 minutes to harden in the container or of course, tube.
If you liked how to make the homemade lavender recipe, you can also check out how to make your amazing lip scrub in 5 minutes.

by Aisha Zakari | Apr 2, 2022 | Local Delicacies
Kilishi (spicy Nigerian beef jerky) is a popular Northern snack and a delicacy obtained from drying meat for a long period of time. This Kilishi recipe is sold mostly in the Northern parts of Nigeria as it originated from Hausa, but the good news is you can also make this delicacy at home.
Let’s tell you how.
Equipment for Making Kilishi
Ingredients
Boneless meat
1-2 tablespoons of honey
1-2 tablespoons of olive oil
2 tablespoons red food coloring
1-2 tablespoons vinegar (optional)
Salt to taste
1-2 seasoning cubes
1 tablespoon garlic (powdered)
1 tablespoon onion powder
½ teaspoon of powdered cloves
1 tablespoon dried pepper (crushed pepper or cayenne pepper)
½ teaspoon of nutmeg (powdered or crushed)
Procedures for Making Nigerian Beef Jerky
STEP 1: Make sure you wash your boneless meat carefully before preparing this Kilishi recipe. Remove any trace of fat from it.
STEP 2: Carefully slice your meat as thin as possible using a sharp knife. Slicing meat is easier when it is frozen. If you can’t do this, get sliced meat from the butchers because they have the sharpest knife for this job.
STEP 3: After slicing all your meat, place it on parchment (or baking paper) on an oven tray.
STEP 4: Bake in the oven for 20–30 minutes at 200F. Then;
STEP 5: Turn the meat pieces over to the other side and bake again for another 30-45 minutes till dry. You notice your meat has a brownish color now.
STEP 6: This method is done easily, thanks to technology. But in the North, instead of using the oven, the meat is dried in the sun for hours till it gets dry. If you don’t have an oven, I suggest you go the local way. It hurts nobody, but it gets the job done.
STEP 7: Now, let’s make our spicy sauce while it continues to bake.
STEP 8: Mix all the ingredients listed above in a bowl.
STEP 9: Using a whisk or a spoon, give this a stir.
STEP 10: Add in water to create a paste and to ease your stirring. Give this mix a stir gradually until the ingredients are well incorporated.
STEP 11: Add salt and a little water if the paste is too thick, or better yet, add water till your desired consistency is achieved.
STEP 12: Now, add in food coloring for that distinct Kilishi recipe look! Then;
STEP 13: Take out the kilishi from the oven.
STEP 14: Using a pastry brush, brush the Kilishi spicy sauce onto the meat. Then;
STEP 15: Brush evenly on both sides till well spread. After this;
STEP 16: Put the meat back in the oven for 10–15 minutes for that dry and crispy taste.
STEP 17: Tada! Note: The longer it stays, the drier it gets. Decide on what texture you want it to have.
Recipes That Best Goes With Kilishi
You can eat kilishi with jollof rice and spaghetti, and it can be used to make soup too. Better yet, enjoy this delicacy with a cold bottle of your favorite soft drink.
Ways to Serve Kilishi
This Kilishi recipe can be enjoyed over lunch and dinner. It can also be made for friends and family over the weekend.
Occasions to serve best
The Nigerian beef jerky can last for months without losing its taste, and as such, it can be served anytime, any day, and, of course, anywhere. Be sure to have something to enjoy.
Nutritional Value of Kilishi
Kilishi is a staple food that is enriched with a unique taste, low-fat content, and nutritional value. It is high in protein and calories but has no vitamins.
How to Store Kilishi
Store Kilishi in a cool, dry place. You can store this in a container or a plastic bag. Make sure it has no contact with water.
Conclusion
There, you’ll never be the same again after making your own Kilishi recipe! Be sure to make some holes in your meat for added beauty and a work of art. Tell us in the comment section when you do.
You are always welcome to visit Northpad Nigeria for more local Northern Nigerian delicacies.
by Aisha Zakari | Apr 2, 2022 | Food & Kitchen
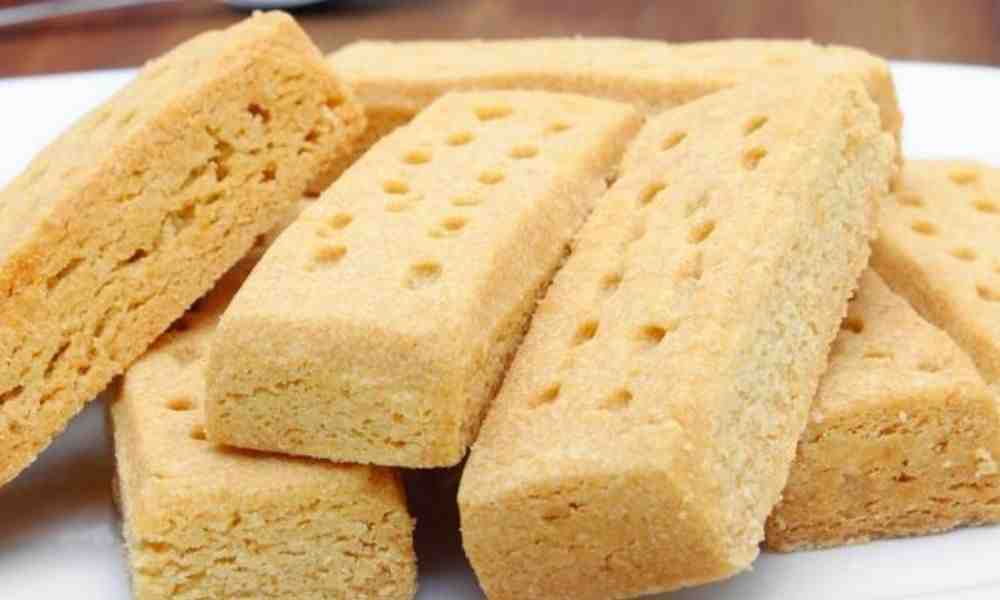
Shortbread, as the name implies, is a finger food to munch on every now and then. This shortbread recipe can be made with just a few ingredients that are mostly lying in your pantry. Let’s get baking.
What is Shortbread?
Shortbread is a traditional Scottish snack with a recipe of one part sugar, two parts butter, and three parts flour. Shortbread doesn’t contain any leavening agents, such as baking powder or baking soda, but mainly just 3 ingredients. Isn’t that interesting?
Equipment for Making Shortbread
Ingredients
2 ½ cups of flour
1 cup (227g) of cold-temperature butter (not margarine)
½ cup of sugar
Procedures for Preparation of Shortbread
STEP 1: In a bowl, add butter and sugar.
STEP 2: Cream this together using an electric mixer for around 5-7 minutes until it becomes creamy, light, soft, and fluffy. Then;
STEP 3: Add in the flour and mix this together till the mixture looks like crumbs. Set the mixer aside.
STEP 4: Lightly grease a baking tray and transfer the dough to it. Now, use your hands to spread it around the edges of the tray.
STEP 5: The dough will be crumbly, but you should be able to press it easily along the edges of the tray. Be careful when pressing.
STEP 6: Using a fork, poke in holes and sprinkle sugar all over the top of the dough.
STEP 7: Now, preheat the oven to 350F to help bake this shortbread recipe. Then;
STEP 8: While preheating, place the baking tray in the fridge for 20 minutes before finally baking.
STEP 9: Place the baking tray in the oven and bake for 20–25 minutes, until the edges get brown and not the top. The edges alone should be brown.
STEP 10: You can cut out the edges and enjoy just the insides, but if you like the crunchy brown sides, enjoy. You can still sprinkle more sugar on top while it’s still warm.
How to Serve Shortbread
Shortbread can be served over tea, a cup of warm milk, or a cup of coffee. You can also enjoy this by drizzling over Caramel Sauce or chocolate sauce
Occasion(s) to Serve Shortbread Best
This recipe can be enjoyed over breakfast with friends, family, loved ones, and even as a couple. It can also be made for Christmas, birthdays, or any other occasion to entertain guests.
How to Store Shortbread
A shortbread recipe can be stored in metal tins, airtight containers, or Ziploc bags for at least 10 days in the refrigerator. If you want them to last longer, freeze them.
Nutritional Value of Shortbread
This sweet tooth delicacy is packed with calories and consuming more than 2-3 may just make you add in weight. But if you’re lucky and do not add in weight, no matter what you eat, you can enjoy this snack. But be careful with your teeth too.
Conclusion
Shortbread recipes are very light and easily digestible, as they are finger-licking and easy to munch on. You can also cut out your own desired shapes and enjoy this any day and anytime. Let us know in the comment section when you give this recipe a try.
Frequently Asked Questions (FAQs)
How is shortbread made?
Shortbread is made from flour, sugar, and butter. These ingredients are mixed until crumbs are formed, and then they are baked in the oven for 20–25 minutes.
Can you make shortbread without an electric mixer?
You do not need an electric mixer to whip up this delicacy at home, but be ready to put your hand to work. Whisk or beat the butter and sugar together till light, creamy, and fluffy.
Should butter be cold or room temperature for shortbread?
Cold-temperature butter is preferable when making a shortbread recipe so as to prevent the dough from being greasy and difficult to roll. Have your butter sit in the refrigerator for around 20 minutes.
Why is my shortbread not crispy?
There are many reasons why this may be happening to you. It could be that the temperature of the oven is not set right, the dough was pressed out or too dry, there is insufficient butter, or there is overbaking. Be sure to measure your ingredients correctly and follow the right procedures.
Are shortbread cookies the same as butter cookies?
No, they are not. Butter cookies are lighter and softer in appearance, whereas shortbread is dense.
How long does shortbread take to harden?
Simply put it in the fridge to chill for at least 15-20 minutes till it hardens.
Why are there holes on shortbread?
Not only do the holes beautify the shortbread, but they also help in evenly distributing heat and making baking easy.
What is the difference between Scottish shortbread and regular shortbread?
There’s no difference between both shortbreads, as the procedures and ingredients are all the same.

