by Fatima Sani | Mar 13, 2022 | Local Delicacies
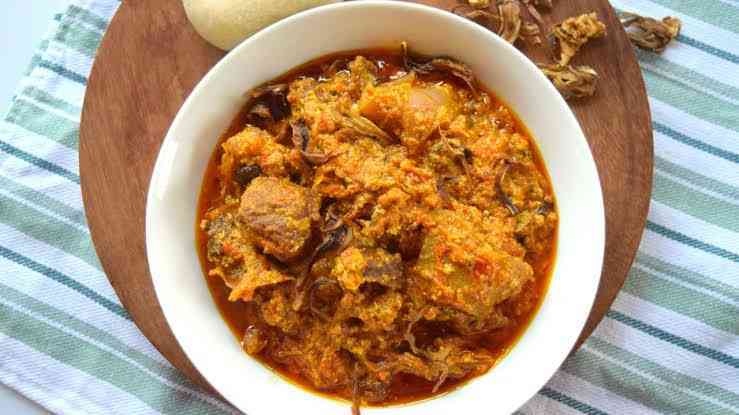
In the northern portion of Nigeria, Miyan Gyada is one of the most popular dishes. It’s not too difficult to make. Because it is mostly cooked with groundnut, Hausas refer to it as Miyan Gyada, while it is called Groundnut Soup in English. In this piece, I am going to teach you how to prepare Miyan Gyada.
Let’s get cooking without wasting too much of your time!
Equipment for Making Miyan Gyada
Ingredients
2 cups of groundnut
Fresh pepper, onions, and tomatoes
2 cooking spoons of palm oil
Meat
Seasoning cubes
Salt to taste
2 medium bunches of spinach or ugwu leaves
Water
Procedure for Preparing Miyan Gyada
STEP 1: Thoroughly wash the meat.
STEP 2: Place the meat in a clean pot over medium heat. Toss in some onions, spices, and a splash of water. Allow for 20 minutes of cooking time.
STEP 3: Prepare the groundnuts while the meat is cooking. Start by removing the stones and dirt from the groundnut, and then place the stone and dirt-free groundnut in a clean tray.
STEP 4: Fry the groundnuts in a clean frying pan for 10 minutes. Allow 5 minutes for cooling.
STEP 5: Using your blender, puree the groundnut until smooth, then set it aside.
STEP 6: Mix the tomatoes, peppers, and onions separately. Before you start blending, make sure you add a little water.
STEP 7: Toss the ground pepper and groundnut into the simmering meat and combine to produce a thick paste. Then;
STEP 8: Thoroughly wash your spinach or ugu leaves and cut or slice them with a chopping board before adding them to the cooking pot.
STEP 9: Pour in the fried palm oil and let it simmer for 5 minutes. Then;
STEP 10: Season with salt and pepper to taste. Allow 10 minutes for cooking.
STEP 11: Your Miyan Gyada or Groundnut Soup is ready for consumption.
Swallow that Goes with Miyan Gyada Best
When eaten with Tuwon Shinkafa or Tuwon Masara, it’s excellent. Teba (Eba), Tuwon Semo, and other swallows are possible. It also goes well with Waina, Sinasir, and Fankasau.
How to Serve Miyan Gyada
Miyan Gyada is best served hot with a glass of chilled water or your favorite beverage.
Occasions to Serve Miyan Gyada Best
It can be eaten as one of the three main meals of the day. It could also be offered at weddings, festivals, walima, and other special occasions.
How to Store Miyan Gyada
It can be refrigerated and kept for several days as long as electricity is available. However, in the absence of a refrigerator, it will only last a few days, and only if you keep warming it in the mornings and evenings. It’s crucial to remember that, while you can preserve it, the taste will be different than when it was freshly prepared.
Nutritional Value of Miyan Gyada
Miyan Gyada is high in energy and contains nutrients, minerals, antioxidants, and vitamins that are beneficial to one’s overall health.
Conclusion
Although its preparation is not simple, you will find that it is well worth the time you put into it because the taste is out of this world. You should try to prepare Miyan Gyada for yourself or your family now that you know how to make it.
If you find this article helpful, please leave a comment in the comments section below.
You are always welcome to visit Northpad Nigeria for more local Northern Nigerian delicacies.
by Fatima Sani | Feb 13, 2022 | Food & Kitchen
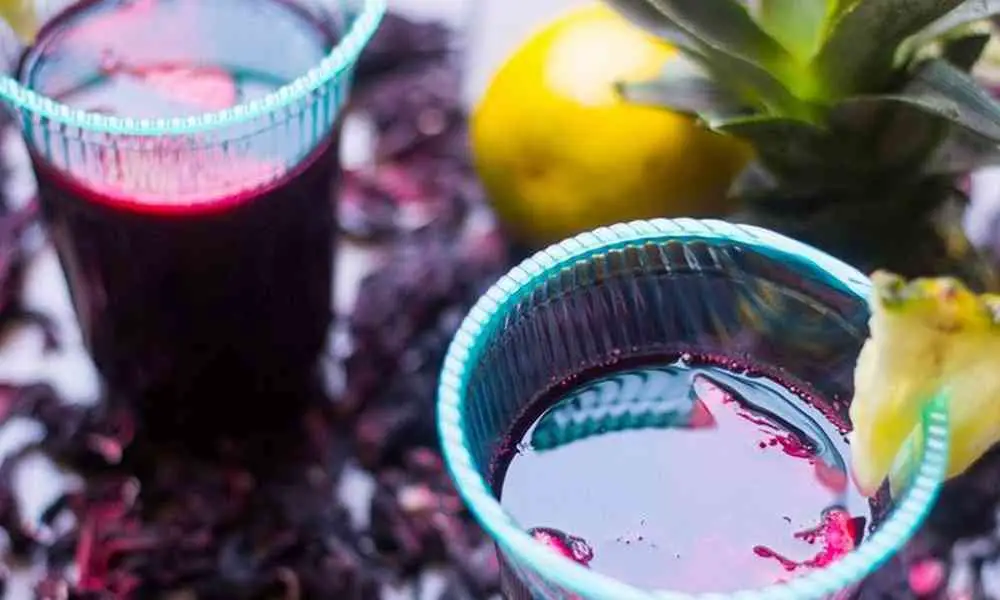
The Zobo Drink recipe is a drink well consumed in all parts of Nigeria. It is made of Roselle or hibiscus leaves. It makes a great occasion drink. In addition, it offers a lot of health benefits, which makes it one of the healthiest drinks. In this article, I will be teaching you how to prepare your delicious drink so that after tasting it, it will keep you wanting to make more and more of it.
What are we waiting for? Let’s go!
Equipment for Making Zobo Drink
Ingredients for Making Zobo Drink
The following ingredients are needed when preparing Zobo Drink:
4 cups of dry zobo leaves
2 spoons of ground ginger
1 tablespoon of cloves (kaninfari)
2 slices of pineapples
7 litres of water
6 small pieces of potash (kanwa) or baking powder.
Sugar
Flavor
Foster Clarks, Nutri C, and Jolly Juice (optional)
Cucumber
Procedure for Preparing Zobo Drink
STEP 1: Pour the zobo leaves into a clean tray and remove dirt and stones.
STEP 2: Pour the leaves into a clean bowl and add some clean water. Then;
STEP 3: Rinse out the dust from the zobo leaves with clean water. When well rinsed, pour into a clean pot.
STEP 4: Over medium heat, place the pot and allow it to boil. Add potash or baking powder.
STEP 5: Wash and cut the pineapples into thin slices and add them to the pot. Allow it to continue boiling for at least 30 minutes.
STEP 6: When the zobo leaves are completely soft, turn off the heat and set them aside to cool for more than 20 minutes.
STEP 7: Stir the zobo leaves, and then pour the zobo into a cheesecloth to remove the leaves and tiny particles. You will have a red-like liquid in the clean bowl. Then;
STEP 8: Add water to the quantity you want.
STEP 9: Also, add the ground ginger and your kanamfari (cloves), sugar, and flavor. Stir very well until the sugar completely dissolves.
STEP 10: You could also add Foster Clark, Jolly Juice, and/or Nutri-C.
STEP 11: Slice your cucumber into small particles and set it aside. Then;
STEP 12: Pour the drinks into bottles and add slices of cucumber to each of them.
STEP 13: Your Zobo drink is ready!
How to Serve Zobo Drink
The Zobo drink recipe is served chilled. You could serve it alone or with Cincin, Fanke (puff-puff), Doughnut, Fankasau, or any snack of your choice. In addition, it can also go with solid foods like Tuwon Shinkafa, Moi Moi, Danwake, etc.
Occasions to Serve Zobo Drink Best
This drink can be served on any occasion, as long as it is well packaged. You could take it together with your breakfast, lunch, or dinner meals. It is also a good dessert.
How to Store Zobo Drink
The most logical advice is to keep this drink in the freezer—not just in the refrigerator, but in the coldest part of it. Store it there for as long as you want.
Zobo drinks recipes, if not properly stored, spoil easily. It lasts for just 24 hours at its best quality.
Nutritional Value of Zobo Drink
Zobo drinks help relieve menstrual pain, manage high blood pressure, lowering cholesterol, protect the liver, promote weight loss, etc. It also serves as an anti-inflammatory agent, anti-bacterial agent, anti-depressant agent, among others.
Conclusion
To the best of my knowledge, this is the most commonly consumed drink in Nigeria. We often pay money to buy them to take. Since it is something that we consume often, why don’t learn how to make it ourselves?
Try it and tell me your experience in the comments section below.
You are always welcome to Northpad Nigeria for more local Northern Nigerian delicacies.
by Fatima Sani | Feb 13, 2022 | Local Delicacies
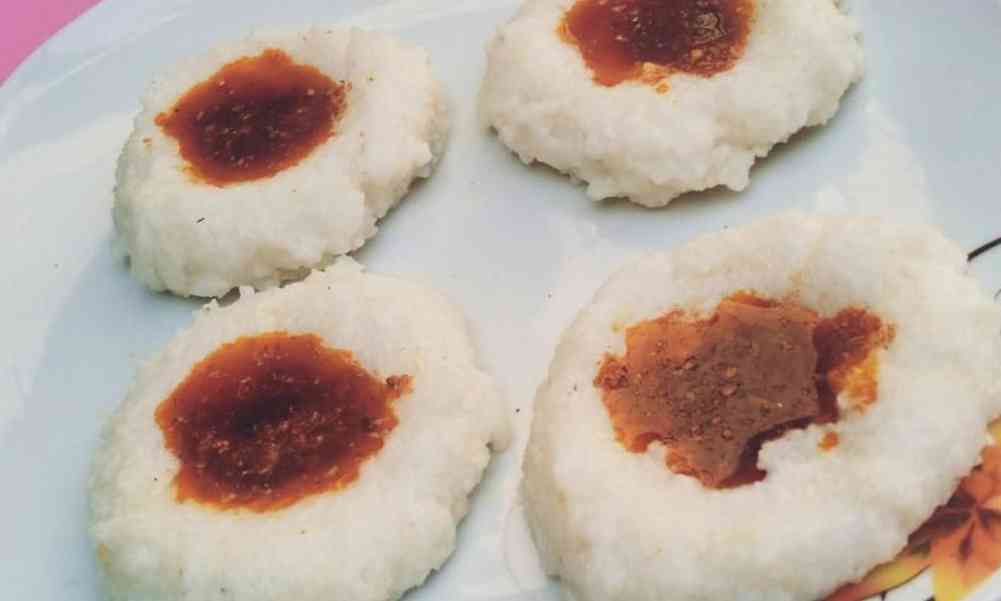
This recipe is one of the local northern Nigerian delicacies that are almost going extinct. Why? Well, it is hard to say, but one thing I know for sure is that it isn’t because of its taste. No. It looks very fine when well prepared. Its major ingredient is coarse maize flour (Tsakin Masara). Shashshaka also refers to Dan Malele – don’t get confused.
Let’s get into it right away!
Equipment for Making Shashshaka
Ingredients
Get the following ingredients ready:
5 cups of coarse flour (tsakin masara)
2 cups of water
Seasoning cubes
Palm oil
Salt to taste
Onions
Ground pepper
Procedure for Preparing Shashshaka
STEP 1: Pour clean water into a pot over medium heat and allow it to boil.
STEP 2: Wash the tsaki properly, remove dirt, stones, and chaff (dussa), and set it aside. Then;
STEP 3: Pour the tsaki into the boiling water and stir it gradually to avoid lumps.
STEP 4: When it starts getting thick, leave it to cook for 30 minutes. Then;
STEP 5: Switch off the heat and take it down.
STEP 6: Get a tray and pour the shashshaka on it. Then;
STEP 7: Allow it to cool for more than 10 minutes.
STEP 8: Get a clean knife and cut it into your desired sizes and shapes. Then;
STEP 9: Over medium heat, put a frying pan and add a little palm oil to it. Slice your onions and add them to the frying pan. Allow frying for 5 minutes.
STEP 10: Remove it from the frying pan, put it on a plate, and add fried palm oil on top of the shashshaka. Add powdered pepper too. Repeat the same process until the pieces of shashshaka are exhausted.
STEP 11: Finally, your Shashshaka is ready for consumption.
How to Serve Shashshaka
The Shashshaka recipe is mostly served with palm oil, powdered pepper, and sliced onions. You could also cut fresh pepper and tomatoes and add them to it; it gets more delicious.
Traditionally, it is normally served on big trays.
Occasions to Serve Shashshaka Best
This is a recipe usually served as breakfast, lunch, or dinner. You could also eat it as an appetizer. However, you do not want to be embarrassed by making it for ceremonies like weddings, festivals, etc.
How to Store Shashshaka
Shashshaka recipe is stored in a cool place and can last for a day or two.
Nutritional Value of Shashshaka
As maize is an energy-giving food, shashshaka serves as an energy-giving food as it provides us with the energy we need for our day-to-day activities.
Conclusion
As delicious as the recipe is, I wonder why it is consumed less and less by the day. Shashshaka is mostly consumed by the poor or average Nigerians, but hey, who says the wealthy can’t have a taste of its sumptuousness?
Try it and tell me about your experience in the comments section below.
You are always welcome to visit Northpad Nigeria for more local Northern Nigerian delicacies.

by Fatima Sani | Jan 30, 2022 | Local Delicacies
The Wainan Fulawa recipe is a northern Nigerian delicacy fried in a manner just like sinasir. Its primary ingredient is wheat flour. It is quite easy to make. Stay with me as I show you how to prepare this delicious northern Nigerian cuisine.
Equipment for Making Wainan Fulawa
Ingredients for Making Wanan Fulawa
The ingredients needed for the preparation are:
Two (2) cups of flour
Fresh pepper
Seasoning cubes
Salt to taste
Vegetable oil
Two (2) eggs (optional)
Procedure for Preparing Wainan Fulawa
STEP 1: Get a clean bowl, sieve the flour, and set it aside.
STEP 2: Grind your pepper and put it inside the sieved flour. Then;
STEP 3: Slice the onions into small pieces and put them inside.
STEP 4: Add a little water and stir it together. Then;
STEP 5: If you choose to make use of eggs, whisk the eggs in a small bowl and add your seasoning cubes to taste.
STEP 6: Add water gradually until it is well combined or mixed. Then;
STEP 7: Place a frying pan over medium or low heat and add some oil – just a little vegetable oil.
STEP 8: When the vegetable oil gets hot, scoop in the batter. When frying, you will see bubbles on top of the Wainan Fulawa.
STEP 9: Flip it to the other side and allow it to fry for 2 minutes, but on low heat. Repeat the process until you are done with the batter.
STEP 10: When done, turn off the heat, and your Wainan Fulawa is done.
How to Serve Wainan Fulawa
It is served with ground dry pepper, and if you like, you could take it with fried palm oil. More so, Kunun Gyada, Kunun Tsamiya, Kunun Tamba, and most Kunus will go with it.
It tastes better when served hot.
Occasions to Serve Wainan Fulawa Best
This delicacy can be prepared any day, anytime, anywhere. As a result, you can take it for breakfast, lunch, dinner, naming ceremonies, sallah periods, birthday parties, wedding ceremonies, etc.
How to Store Wainan Fulawa
Wainan Fulawa is just like Sinasir in terms of storage. It is best stored in a cool, dry place, like a warmer. Also, it can last for two days. It makes it last longer when stored in a refrigerator.
Nutritional Value of Wainan Fulawa
Wainan Fulawa is primarily composed of carbs but also has moderate amounts of protein. Here are the nutrition facts for 3.5 ounces, which is equivalent to 100 grams of whole-grain wheat flour: calories (340), water (11%), protein (13.2 grams), sugar (0.4 grams), carbs (72 grams), fiber (10.7 grams), and fat (2.5 grams).
In addition, eating Wainan Fulawa has many health benefits which make it an interesting delicacy.
Conclusion
Wainan Fulawa’s recipe is delicious, as a lot of people I know have testified. It is one of my favorite local delicacies, and I love to take it for breakfast.
It will interest you to know that you don’t necessarily need to fry it with vegetable oil, palm oil too can do the job just fine.
Now that you know how to prepare Sinasir, tell me in the comments section below your experience on it.
You are always welcome to Northpad Nigeria for more local Northern Nigerian delicacies.

by Fatima Sani | Jan 30, 2022 | Local Delicacies
The sinasir recipe is one of the many sweet recipes in the Northern part of Nigeria. It tastes so sweet and delicious that it will keep you asking for more. It is basically made with short-grain rice—the one used to make Tuwon Shinkafa. Also, it is very easy to make.
Without any further ado, let’s dive into its preparation, shall we?
Equipment for Making Sinasir
Ingredients for Making Sinasir
This northern Nigerian cuisine is prepared with the following ingredients:
Three (3) cups of short-grain rice
Two (1) cups of per-boiled rice
Two (2) teaspoons of yeast
½ teaspoon of baking powder
Four (4) teaspoons of sugar
A cup of water
Pinch of salt
Vegetable oil
Onions
Procedure for Preparing Sinasir
STEP 1: Let’s start by placing the rice in a clean bowl and adding enough water inside the rice to soak for more than 3 hours.
STEP 2: Wash the rice properly. Make it look very clean.
STEP 3: Proof the yeast by adding some warm water inside the yeast and setting it aside.
STEP 4: After washing the rice, drain off the water and rinse the rice. Then;
STEP 5: When the rinsing is done, blend the soaked rice with a little water. When done, add the parboiled rice and blend it too.
STEP 6: Mix it together and stir it very well, then add a little bit of small water and stir it until it becomes very soft.
STEP 7: After that, add a pinch of salt, sugar, and the proofed yeast. Stir together until well combined.
STEP 8: Cut the onions into small pieces and add them to the batter. The batter shouldn’t be too thick or too watery.
STEP 9: Cover it up and allow it to proof for more than 2 hours. When it is done, it is time for frying.
STEP 10: Over medium heat, place a frying pan and add a little bit of oil to the pan. Leave the oil to fry for two minutes.
STEP 11: Pour the batter into the frying pan and allow it to fry for 4 minutes. When fried, flip it up to the other side and allow it to fry for 2 minutes.
STEP 12: Take it off the heat, put it inside a warmer, and cover it so that it doesn’t get cold. Then;
STEP 13: Repeat the previous steps until all the sinasir has been exhausted.
STEP 14: Tadaaa! Your Sinasir recipe is ready.
How to Serve Sinasir
The sinasir recipe is served with vegetable soup (Miyan Alayyahu), pepper soup, and even sugar. You could also eat it with any sauce of your choice—onion sauce, egg sauce, and the like.
Remember to serve hot.
Occasions to Serve Sinasir Best
The tastiness of this meal makes it difficult for people not to serve it on different occasions like wedding ceremonies, Eid-El Fitr, naming ceremonies, birthday parties, and many more.
How to Store Sinasir
Sinasir is best stored in a cool and dry place like a warmer. It can last for 2 days. It makes it last longer when stored in a refrigerator.
Nutritional Value of Sinasir
Sinasir is a good source of energy, can help reduce the risk of cancer, prevents obesity, and is a good source of protein.
Conclusion
As you have seen, making Sinasir recipe is very easy and when done correctly, looks very appetizing and tastes delicious. Remember, do not make it too thick or too watery, or else, the batter will scatter in the frying pan.
Now that you know how to prepare Sinasir, tell me in the comments section below your experience on it.
You are always welcome to Northpad Nigeria for more local Northern Nigerian delicacies.

