by Aisha Zakari | May 29, 2022 | Food & Kitchen
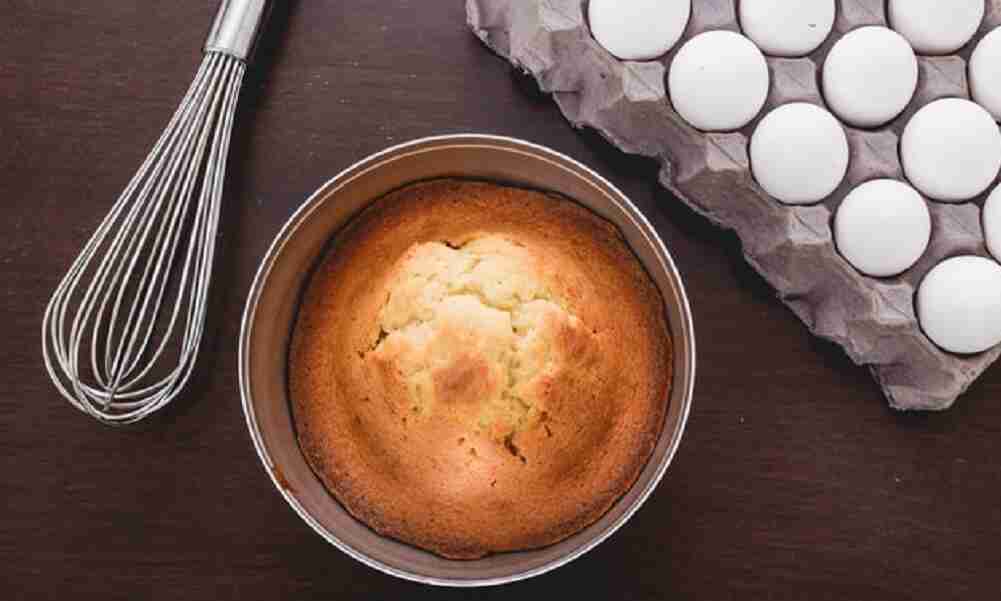
Sponge cake (or yellow cake) is a soft, spongy, and delicious cake with a brownish outer surface and a whitish inner surface. This is made with lots of eggs, sugar, and flour, and I’ll be walking you through the sponge cake recipe.
Equipment for Making Sponge Cake
Ingredients for Making Sponge Cake
1 cup of flour
3 tablespoons of milk (optional)
3 tablespoons of oil
4 eggs
¼ cup of sugar
¼ cup of butter
½ tablespoon of vanilla essence
Procedures for Preparation of Sponge Cake
STEP 1: Crack your eggs and separate the yolks from the whites in different bowls.
STEP 2: Meanwhile, preheat the oven to 350F.
STEP 3: In your bowl of yolks, give this a whisk and add milk, oil, and vanilla essence.
STEP 4: Gradually sift the flour into the bowl and give it a stir. Mix until well incorporated and set this aside.
STEP 5: In the bowl of whites, using a hand mixer, beat for 20 minutes from medium to high until it begins to foam.
STEP 6: Add in sugar and continue beating till stiff peaks. Here, you see the egg whites looking thick, creamy, and white.
STEP 7: Now add this to the bowl of yolks. Fold it in and mix.
STEP 8: Get the clean baking pan. It’s time to bake this sponge cake recipe.
STEP 9: Grease the pan with butter and add parchment paper to the sides and bottom of the pan. You may also dust with flour after greasing.
STEP 10: Pour the batter into the prepared pan. Do not fill to the brim to avoid pouring while baking.
STEP 11: Bake for 25–30 minutes or until a toothpick comes out clean when inserted in the middle of the pan. Do not open the oven while baking.
STEP 12: Remove from the oven using a hand glove or mittens.
STEP 13: Allow it to cool for 5–10 minutes or place it on a rack for easy air ventilation.
STEP 14: Enjoy!
Recipes that Best Goes with It
Sponge cake goes with ice cream, milkshakes, and, of course, soft drinks like Coca-Cola, etc.
How to Serve Sponge Cakes
Sponge cake should be served to friends, loved ones, and family immediately as it cools off. You can also enjoy sponge cakes with these 3 different ways of making chocolate sauce.
Occasion to Serve Sponge Cakes Best
This delicious sponge cake recipe can be served any day, anytime, and anywhere. It could serve as a lunch box for kids, birthday parties, or after-party snacks.
Nutritional Value of Sponge Cakes
This snack is packed with benefits such as low calories when eaten, a good source of energy, and, of course, the unique flavors in your kitchen.
How to Store Sponge Cake
Store in the freezer for 2–3 days. I suggest you wrap before storing and also consume within a day. Enjoy!
Conclusion
Are you in the kitchen already? Whisk up this recipe and tell us how you made this soft, fluffy, spongy, and delicious sponge cake recipe. Be sure to let us know when you do in the comment section.
FAQs
Can I use butter or margarine for my sponge cake?
With margarine, you get a softer and more fluffy texture in cakes than with butter. Butter has a great taste and smell but it makes cake dense and dries out the moisture. Margarine should be your go-to when making this sponge cake.
What is the difference between regular cake and sponge cake?
A very good difference between regular cake and sponge cake is that the latter is made with lots of eggs, while the former contains baking powder or baking soda.
What is the difference between butter cake and sponge cake?
Butter cake relies on butter or margarine and some leavening agents such as baking powder and baking soda, whereas sponge cake relies on the beaten eggs and air that gets into it.
What are the four types of sponge cakes?
These are Swiss roll sponge, Devil’s Food Cake, Forrest sponge cake, Angel Food Cake, and many other types of sponge cakes.
What is the secret to sponge cake?
The secret to sponge cake is in its texture, the eggs, and the absence of leavening agents like baking soda and baking powder. In sponge cake, the leavening agents are in the eggs and the air is gotten from beating them using the mixer. Sponge cakes are soft, light, fluffy, and airy, and this is a result of beating egg whites.
by Aisha Zakari | May 29, 2022 | Food & Kitchen
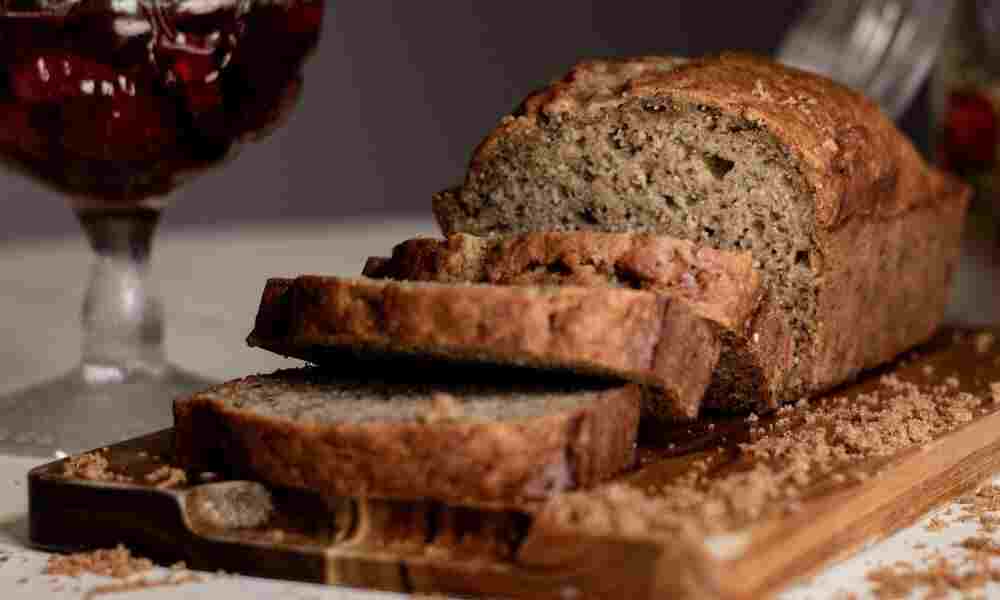
Do you ever get bored of the same old bakery bread? Do you ever want to try something new with bread? If this thought has run through your mind, then how to make banana bread recipe is for you!
Too often, I find bread to be bland and I tend to crave something new and interesting. Sometimes, I opt for sponge cake, cupcakes, or something sweet at the very least. In this article, I’ll be sharing with you how to make the moist and delicious banana bread recipe for friends and family and, most of all, for yourself. So, sit back, relax, and enjoy this recipe.
Equipment for Making Banana Bread
Ingredients for Making Banana Bread
2-3 overripe bananas
½ teaspoon baking soda
76g of melted butter
A pinch of salt
150g of sugar
1 egg
1 teaspoon of vanilla extract
205g of flour
80g of plain yogurt (optional but this adds moisture to the bread)
Nuts (your choice but optional as it gives it a crunchy taste)
1 cup of chocolate chips (optional)
Procedures for Making Banana Bread
STEP 1: Before you put your hands to work, preheat the oven to 350F and butter your baking pan. A small baking pan is more than okay for this.
STEP 2: Now, let us get you started on how to make banana bread.
STEP 3: In a mixing bowl, mash your bananas using a fork until completely smooth.
STEP 4: Add melted butter into the bowl.
STEP 5: Add baking soda and salt.
STEP 6: Again, add in sugar, an egg, and vanilla extract. If you’re using yogurt, add it in.
STEP 7: Lastly, add flour, nuts, and chocolate chips (if you will be using them) and mix them in.
STEP 8: Get your pan and pour the batter into it.
STEP 9: Bake for 50 minutes to an hour after placing the pan into the middle of the oven at 350F
STEP 10: Bake until a toothpick comes out clean when inserted in the middle.
STEP 11: Take out of the oven using a mitten and allow it to cool for a few minutes.
STEP 12: Now, remove the bread from the pan and let it cool completely before serving.
STEP 13: Using a knife, slice and serve.
How to Serve Banana Bread Recipe
Now that you know how to make banana bread, how do you serve it? Slice and serve your banana bread as breakfast and dessert along with fruits such as strawberries, raspberries, and jam. Another way of enjoying this recipe is along with fruit juice such as orange, or apple, or serve with toppings like peanut butter, Nutella or chocolate drizzle, or even caramel drizzle.
Occasions to Serve Banana Bread Recipe Best
Banana bread recipe is mostly eaten over breakfast with friends and family and eaten as dessert to savor something sweet and delicious. You can make this for birthdays, Eid celebrations, and even on special days to share with loved ones.
How to Store Banana Bread Recipe
Place your loaf of bread in a plastic wrap and store it in an airtight container. You can store it for up to 2-3 days.
Nutritional Value of Banana Bread Recipe
Whether you’re making your banana bread recipe at home or buying it online, it can be a health bomb or a health attack. Banana bread recipe has been proven to be packed with proteins, energy-boosting, and contains fats but healthy fats.
Conclusion
This recipe is not only delicious but moist and sweet and the ingredients on how to make banana bread are most definitely lying around in your pantry/store at home. When you go to the market, be sure to buy some bananas so you can make them at home. Be sure to let us know in the comment section when you make some.
FAQs
What is the difference between banana loaf and cake?
Banana bread is made just as above, it is dense and banana is used while the cake is made with banana as the main ingredients. Here, banana bread was used mostly as a flavor and taste.
Do I need a mixer for my banana bread recipe?
No, you do not need a fancy mixer to whip this recipe up. A simple bowl, a fork, or a whisk is all you need.
Do I fill the batter to the brim of the pan?
No, fill the pan halfway and never to the brim of the pan. If you by chance have excess, use another pan to bake it.
Why is my banana bread hard?
In baking, mistakes such as overmixing batter can happen. Instead of mixing when you add in ingredients, add all the ingredients in a bowl and give it just a mix instead of adding one at a time and mixing when you do.
Why is my banana bread brown?
This is because you added too much baking soda. Too much baking soda increases the alkalinity or basicity of your batter. Remember to use just ½ teaspoon of your baking soda.

by Angela Bala | Mar 13, 2022 | Food & Kitchen
Irish potatoes (white potatoes) are a common food in many parts of the world. They are one of the most consumed and enjoyed vegetables worldwide, as they are very easy to prepare and pleasing to the eyes and stomach. Due to the versatility of Irish potatoes, they have become a primary ingredient in all types of cuisine, as they can easily be fried, boiled, mashed, baked, or cooked as porridge. It also serves as a complement to different dishes, and new recipes can be created from them, like our delicious Irish potato porridge recipe for today.
Irish potato porridge, also known as white potato porridge, is a simple and fast meal to prepare, just like sweet potato porridge and yam porridge. It is not only super mouth-watery but also naturally packaged with medicinal benefits. Interested? Let me guide you through.
Equipment for Making Irish Potato Porridge
Ingredients for Making Irish Potato Porridge
To begin with, for this easy Irish potato recipe, we need:
Irish Potatoes
Vegetable oil or Palm oil
Onion
Red and Green Bell peppers (tatta sai)
Chilies (shombo)
Habanero Pepper(atarugu)
Seasoning cubes
Salt (to taste)
Carrots (optional)
Garlic
Ginger
Curry
Scent leaves (efirin)
Fresh Pumpkin leaves (Ugu) or Spinach (Alayaahu)
Water
Stock (chicken meat or fish)—optional
Procedures for Preparing Irish Potato Porridge
The preparation of some Irish potato porridge is somewhat similar to that of yam and sweet potato porridge. However, I really love to get creative and spice things up a bit. So, if you’re curious about this special and easy recipe, keep reading!
STEP 1: Wash and season beef, chicken, or fish with enough garlic, ginger, curry, thyme, and seasoning cubes to your own taste (for this Irish potato porridge recipe, I will be using beef). Cook till almost tender.
STEP 2: Separate the beef from the stock once it is cooked and cut the beef into bits. Set aside.
STEP 3: Add a little water to the meat stock in order to have enough stock for the potato porridge and boil.
STEP 4: Peel the potatoes, wash them, and cut them into medium sizes. Stir in potatoes to the already boiling beef stock and cook for at least 5 minutes to absorb the flavor.
STEP 5: Taste for salt and add seasoning cubes if necessary. (It is necessary to cut down on salt since the beef stock is already well seasoned.)
STEP 6: Add in oil of choice (preferably vegetable oil), chopped bell peppers, chilies, and onions. Add beef bits as well, and leave the mixture on fire to cook on high heat till it becomes very soft.
NB: Unlike yam and sweet potato, Irish potato is waxy in nature. It does not have a high starch content as it still holds its form even after cooking, which is why it is less likely to be mashed and to take on a thick form on its own. So you can decide to remove and mash some of your potatoes and add them back to help thicken the porridge if you think it’s too watery.
STEP 7: While the porridge is still cooking, wash and cut the leaves and carrots.
STEP 8: Remove the lid and stir the potato porridge well, then add the carrots, pumpkin leaves, and scent leaves. Reduce heat and leave to simmer for about 3 minutes.
STEP 9: Put off the heat and serve steaming hot.
How to Serve Irish Potato Porridge
This Irish potato porridge can be served as a main dish or as a side dish; whichever way, it still tastes great. It can absolutely be enjoyed with bread or any desired pastry, and beverages of any kind, like zobo, are also welcome to complement this yummy dish.
Occasions Best to Serve Irish Potato Porridge
The serving of Irish potato porridge is up to you! It can be served for breakfast, lunch, or dinner, whichever way you prefer, and on any occasion. Serve this at any event, and I bet your guests will come asking for more.
How Irish Potato Porridge is Stored
Leftover Irish potato porridge should always be stored in the refrigerator to prevent it from being stale and to ensure proper preservation.
Nutritional Benefits of Irish Potato Porridge Recipe
Studies on Irish potatoes have shown that they have a higher level of dietary fibre and carbohydrate which improves digestion, optimizes body function, and regularizes bowel movements. The vitamin C content in Irish potatoes prevents scurvy and also serves as an antioxidant and anti-inflammatory agent that repairs damaged cells within the body. also supports the immune system and gives relief to any form of inflammation, such as arthritis.
Consuming potatoes will give a good source of potassium to the body which is capable of lowering blood pressure and preventing heart attacks, it also works to reduce cramps, therefore, proving Irish potato porridge is a nutritious and medical dish.
Are there more benefits to eating Irish potato porridge? Oh yes! The dietary fiber and carbohydrates present in the potatoes help with both weight loss and weight gain, which lots of people work hard towards achieving. The nutrients obtained from eating a potato dish also help the skin regenerate and maintain healthy skin.
Is that all? Oh no! Because of the other ingredients present in the dish, it is loaded with carbohydrates, proteins, minerals vitamins, and even fat and oil—these are what I like to call the complete package.
Conclusion
And it’s a wrap for this luscious Irish potato recipe my dear comrades! It is indeed very simple, easy to prepare, and has a variety of impressive health benefits. I have no doubt that you can make this Irish potato porridge at home for your family and friends. Please make me proud by sharing their thoughts and yours in the comments section below. Let’s get cooking guys!
by Abu Hafsah | Jan 23, 2022 | Food & Kitchen
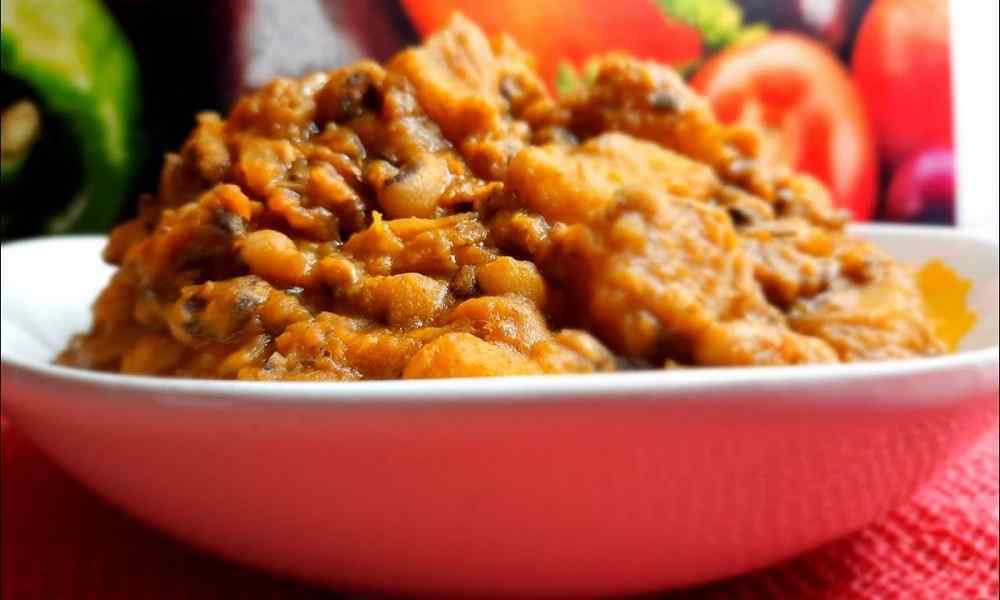
Faten Wake, otherwise known as Beans Porridge in the English language, is a food consumed basically by almost all tribes in Nigeria. I seriously don’t know any tribe that doesn’t. To be more specific, the Yorubas are the major consumers of this type of recipe. This article seeks to walk you through how to prepare bean porridge (faten wake).
The primary ingredient for this delicacy is beans. Of course, it has to be because the name of the recipe implies that.
What are we waiting for? Let’s get started on how to prepare bean porridge!
Equipment for Making Beans Porridge
Ingredients for Making Beans Porridge
2 cups of beans
Spices (maggi, curry powder, etc.)
Vegetables like pepper, onions, tomatoes, etc.
A small bunch of spinach (optional)
½ cup of vegetable or palm oil
Boiled or fried meat or fish (optional)
Salt to taste
Procedure for Making Faten Wake
STEP 1: Pick the dirt out of the beans
STEP 2: Wash the beans well. Then;
STEP 3: Over medium heat, put the washed beans in a pot and allow them to cook. Do this for 30 minutes. If you wish, you could add kanwa (potash) to it to speed up the process.
STEP 4: By now, the beans are soft. Wash the beans well with clean water and put them in a bowl. Set this aside.
STEP 5: Put a clean pot over medium and pour in your vegetable or palm oil.
STEP 6: Slice your onions, tomatoes, and pepper and put them into the pot in STEP 5. Allow to fry for 10 minutes. Ensure you stir gently from time to time to avoid sticking to the bottom of the pot.
STEP 7: Now, add a little water to the pot and pour in your meat or fish. Remember, adding meat or fish is optional. Allow it to boil for 5 minutes.
STEP 8: Add your boiled beans to the pot and stir gently. Leave to cook for another five minutes.
STEP 9: Now slice your spinach and wash thoroughly before you add it to the pot. Allow to simmer.
STEP 10: Add in your salt, Maggi, and other spices like curry powder. Allow it to cook for 5 minutes too.
STEP 11: Taste the meal and add spices if need be. Turn off the cooker, and your Faten Wake is done.
How to Serve Faten Wake
Faten Wake recipe is served with soaked or raw garri (soak the garri and eat with the beans or pour the raw garri on the recipe and stir, then eat), bread, water, etc. You could also eat it with fried plantains, fried chips, boiled or fried eggs, and lots more.
Don’t forget to serve it hot, as it tastes better when hot.
Occasions to Serve Faten Wake
Faten Wake can be eaten as breakfast, lunch, or dinner. Yorubas even serve it at naming ceremonies, weddings, festivals, etc. Basically, Faten Wake is for all occasions.
How to Store Faten Wake
Beans have a high tendency to spoil; as a result, ensure you make just enough for immediate consumption. However, if it is more than enough, you can store it in a refrigerator, and that will make it last for days to the detriment of its delicious taste.
Nutritional Value of Faten Wake
Because the major constituent is beans, Faten Wake helps in repairing the body as it contains protein; it helps in making healthy red blood cells, and it helps in preventing neural tube defects in a fetus during pregnancy.
In addition, people who consume beans on a regular basis are less likely to die of heart attacks or other cardiovascular illnesses. It also helps in reducing the risk of cancer, stabilizing blood glucose or even preventing diabetes, preventing fatty liver, and lots more.
Conclusion
As you have seen, how to prepare Beans Porridge (Faten Wake) is like a walk in the park if you follow the above-mentioned steps. If this recipe is new to you, I hope you try making it soon so as not to miss out on its amazing taste.
If you find this article helpful, please leave a comment in the comments section below.
You are always welcome to visit Northpad Nigeria for more local Northern Nigerian delicacies.

by Abu Hafsah | Jan 23, 2022 | Local Delicacies
As the name implies in Hausa, Kunun Gyada is derived from Kunu (meaning pap) and Gyada (meaning groundnut); when you put the two words together, you will have Kunu Gyada, meaning Groundnut Pap. It is a pap that is very popular in northern Nigeria, most especially among the Fulanis, whom you cannot wait to add to your meals, especially breakfast, although Hausas are beginning to embrace the consumption of this recipe too.
There are two ways to prepare the Kunun Gyada: one with rice and one without. In this article, I will take you through the process of making the two. There are two major ingredients for preparing Kunun Gyada that need processing before usage: groundnut and guinea corn. It is paramount that you know how to go about processing the two. Let’s see how:
How to Process the Groundnut for Kunun Gyada
STEP 1: Get your groundnut (preferably the one with the red back because it contains less oil) and pick the dirt from it.
STEP 2: Over high heat, put a frying pan (the size of the frying pan should depend on the quantity of groundnut) and pour sharp sand (sandy soil) into it. Then;
STEP 3: When the sand gets very hot, pour in your groundnut and stir at regular intervals—say, 5 seconds of waiting time in between stirs. Roast for 20 minutes
STEP 4: When roasted, put the frying pan down and spread on a hard surface so as to cool faster.
STEP 5: Pick out the groundnut from the sandy soil. Then;
STEP 6: Peel the back of the groundnut.
STEP 7: If the groundnut isn’t much, you can use a blender by adding a little water to it and blending until it turns into a paste. However, if it is in large quantity, take it to a commercial grinding machine.
How to Process the Guinea Corn for Kunun Gyada
For the guinea corn, well, there are two ways you can have it: either in powdered form or in the form of a paste. For the one in paste form:
STEP 1: Pick the dirt from the guinea corn and wash it well.
STEP 2: Soak in water for 6 hours. You could do that overnight if you intend to make it in the morning.
STEP 3: By now, the grains are already soft. Good.
STEP 4: Wash the grain again and add ginger and kaninfari (cloves).
STEP 5: If it is in small quantity, you can use a blender. Blend it until it turns to paste. If it is a large quantity, I will advise you to take it to a commercial grinding machine.
For the powdered form:
STEP 1: Pick the dirt from the guinea corn and wash it well.
STEP 2: After washing, drain it well and spread it on a mat outside to dry. Then;
STEP 3: Add ginger and kaninfari (cloves) to it.
STEP 4: Use a blender to grind it if it is in small quantities. Resort to a commercial grinding machine if it is in large quantity.
STEP 5: Use a sieve to sieve it well.
Well, to save you all the stress, both the groundnut and guinea corn (paste or powered) have already been sold in the markets.
Having known all this, let’s get cooking!
How to Make Kunun Gyada (with Rice)
Ingredients
You will need the following ingredients to make Kunun Gyada with rice:
1 cup of roasted groundnut
Tamarind (tsamiya)
2 cups of powdered guinea corn, or the desired quantity if using the paste form.
Short-grain rice
Sugar
Procedure for Preparing Kunun Gyada (with Rice)
STEP 1: Soak the short-grain rice with hot water for 30 minutes and set aside.
STEP 2: Soak the tamarind (tsamiya) for 10 minutes with hot water and set aside. Then;
STEP 3: Get your powered guinea corn; pour water into it until it turns into something like a paste, but more watery. If you are using the one in paste, just add a little water and mix well. Set aside, too.
STEP 4: Get a clean bowl and pour in the roasted groundnut paste. Stir it gently, and it is properly mixed. Then add more water to it until it turns very watery for sieving ease.
NB: For the next 4 steps, ensure you have the exact quantity of Kunun Gyada that you want at the end of the day in the back of your mind, and consider that as you are ‘adding’.
STEP 5: Get a sieve and sieve it into a clean pot. You can repeat the sieving if you feel it is not smooth enough for you.
STEP 6: Put the pot over medium heat and add STEP 1 (soaked rice)
STEP 7: In the same pot, sieve STEP 2 (soaked tamarind). Then;
STEP 8: Allow the contents of the pot to boil. However, before it starts boiling, you need to be close to it to avoid spilling by stirring it regularly. Allow it to cook for 5 minutes.
STEP 9: Switch off the heat and allow it to cool for 5 minutes. This is very important, as it helps prevent lumps.
STEP 10: Now, get STEP 3 and add the content to the pot. Stir gently as you pour.
STEP 11: Tada! Your Kunun Gyada with rice is ready!
How to Make Kunun Gyada (without Rice)
Ingredients
Same with the ingredients used in making the one with rice except for the rice.
Procedure for Preparing Kunun Gyada (without Rice)
Repeat every step above, except that you will take out the steps that include rice.
How to Serve Kunun Gyada
This recipe can be served with Kosai, Fried Yam, Fried Sweet Potato, Fried Irish Potato, bread, Kuli-Kuli (Groundnut Cake), Moi Moi and various types of snacks.
Don’t forget to serve hot, but not too hot.
Occasions to Serve Kunun Gyada
For the core Fulanis, most especially those in Adamawa and Gombe, this recipe is a meal for any day, any time, and any event. As such, it can be served in naming ceremonies, wedding ceremonies, condolence waits, Eids, special occasions, breakfast, lunch, dinner, etc.
How to Store Kunun Gyada
This delicacy can be stored in a food flask or any warmer of your choice. However, to avoid hardening the surface of the Kunu in your warmer, sprinkle a little water on top of the Kunu before closing.
Kunun Gyada lasts for 24 hours in its best form. It is also important to know that it cannot be stored in a refrigerator.
Nutritional Value of Kunun Gyada
The nutritional value of Kunun Gyada cannot be overemphasized, as it is a good source of vitamins and minerals such as vitamin E, Magnesium, Folate, Copper, and Arginine. Again, the protein-rich composition of the groundnut in Kunun Gyada makes it great for people who are either trying to lose weight or trying to gain muscle strength. It also improves brain functioning, reduces cholesterol, and so much more.
You could also check out 8 weight loss exercises you can do at home.
Conclusion
Avoid taking this delicacy while it is very hot. You could hurt yourself because of the groundnut in it, which helps retain heat. Now that you know how to make Kunun Gyada, I believe you have another choice among the choices that you have to make for meals, most especially breakfast. Tell me in the comments section when you will be making this change.
If you find this article helpful, please leave a comment in the comments section below.
You are always welcome to visit Northpad Nigeria for more local Northern Nigerian delicacies.
