by Aisha Zakari | May 29, 2022 | Food & Kitchen
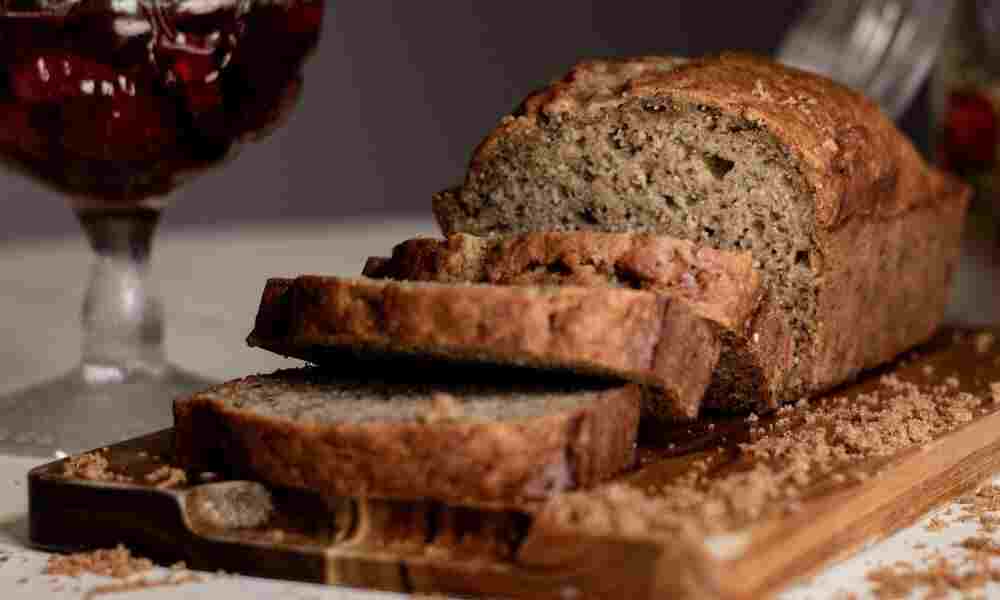
Do you ever get bored of the same old bakery bread? Do you ever want to try something new with bread? If this thought has run through your mind, then how to make banana bread recipe is for you!
Too often, I find bread to be bland and I tend to crave something new and interesting. Sometimes, I opt for sponge cake, cupcakes, or something sweet at the very least. In this article, I’ll be sharing with you how to make the moist and delicious banana bread recipe for friends and family and, most of all, for yourself. So, sit back, relax, and enjoy this recipe.
Equipment for Making Banana Bread
Ingredients for Making Banana Bread
2-3 overripe bananas
½ teaspoon baking soda
76g of melted butter
A pinch of salt
150g of sugar
1 egg
1 teaspoon of vanilla extract
205g of flour
80g of plain yogurt (optional but this adds moisture to the bread)
Nuts (your choice but optional as it gives it a crunchy taste)
1 cup of chocolate chips (optional)
Procedures for Making Banana Bread
STEP 1: Before you put your hands to work, preheat the oven to 350F and butter your baking pan. A small baking pan is more than okay for this.
STEP 2: Now, let us get you started on how to make banana bread.
STEP 3: In a mixing bowl, mash your bananas using a fork until completely smooth.
STEP 4: Add melted butter into the bowl.
STEP 5: Add baking soda and salt.
STEP 6: Again, add in sugar, an egg, and vanilla extract. If you’re using yogurt, add it in.
STEP 7: Lastly, add flour, nuts, and chocolate chips (if you will be using them) and mix them in.
STEP 8: Get your pan and pour the batter into it.
STEP 9: Bake for 50 minutes to an hour after placing the pan into the middle of the oven at 350F
STEP 10: Bake until a toothpick comes out clean when inserted in the middle.
STEP 11: Take out of the oven using a mitten and allow it to cool for a few minutes.
STEP 12: Now, remove the bread from the pan and let it cool completely before serving.
STEP 13: Using a knife, slice and serve.
How to Serve Banana Bread Recipe
Now that you know how to make banana bread, how do you serve it? Slice and serve your banana bread as breakfast and dessert along with fruits such as strawberries, raspberries, and jam. Another way of enjoying this recipe is along with fruit juice such as orange, or apple, or serve with toppings like peanut butter, Nutella or chocolate drizzle, or even caramel drizzle.
Occasions to Serve Banana Bread Recipe Best
Banana bread recipe is mostly eaten over breakfast with friends and family and eaten as dessert to savor something sweet and delicious. You can make this for birthdays, Eid celebrations, and even on special days to share with loved ones.
How to Store Banana Bread Recipe
Place your loaf of bread in a plastic wrap and store it in an airtight container. You can store it for up to 2-3 days.
Nutritional Value of Banana Bread Recipe
Whether you’re making your banana bread recipe at home or buying it online, it can be a health bomb or a health attack. Banana bread recipe has been proven to be packed with proteins, energy-boosting, and contains fats but healthy fats.
Conclusion
This recipe is not only delicious but moist and sweet and the ingredients on how to make banana bread are most definitely lying around in your pantry/store at home. When you go to the market, be sure to buy some bananas so you can make them at home. Be sure to let us know in the comment section when you make some.
FAQs
What is the difference between banana loaf and cake?
Banana bread is made just as above, it is dense and banana is used while the cake is made with banana as the main ingredients. Here, banana bread was used mostly as a flavor and taste.
Do I need a mixer for my banana bread recipe?
No, you do not need a fancy mixer to whip this recipe up. A simple bowl, a fork, or a whisk is all you need.
Do I fill the batter to the brim of the pan?
No, fill the pan halfway and never to the brim of the pan. If you by chance have excess, use another pan to bake it.
Why is my banana bread hard?
In baking, mistakes such as overmixing batter can happen. Instead of mixing when you add in ingredients, add all the ingredients in a bowl and give it just a mix instead of adding one at a time and mixing when you do.
Why is my banana bread brown?
This is because you added too much baking soda. Too much baking soda increases the alkalinity or basicity of your batter. Remember to use just ½ teaspoon of your baking soda.
by Angela Bala | May 8, 2022 | Local Delicacies, Food & Kitchen
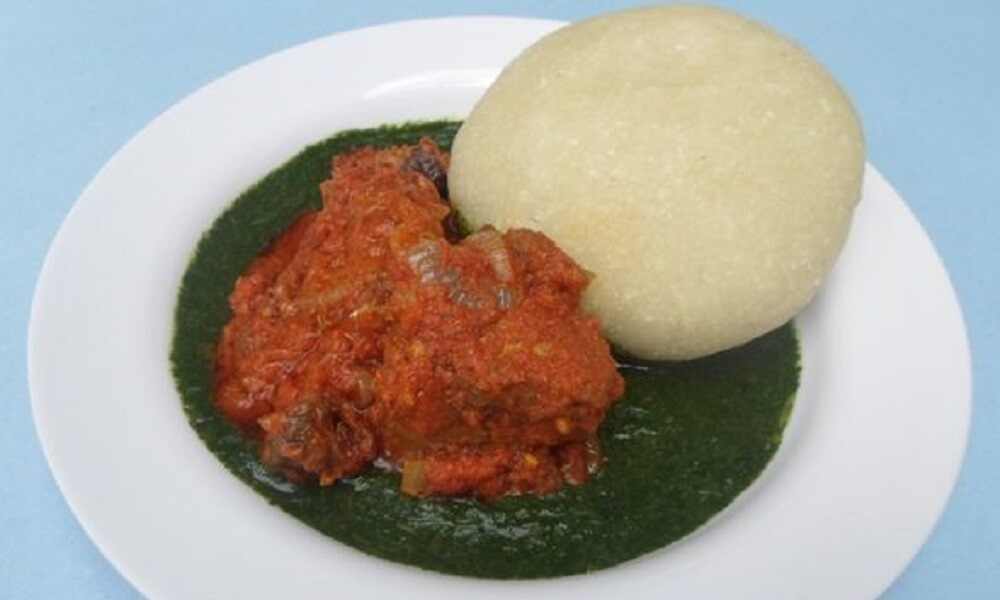
Tuwon Alabo, or cassava swallow, as people like to call it, is a local dish made from cassava flour (Alabo), which is produced by fermenting peeled cassava in water, sun-drying the fermented cassava, and milling it into powdered form. This flour comes from a root vegetable called cassava. It is also a great substitute for wheat flour and yam flour in a variety of recipes, including tuwon masara. This article seeks to teach you how to prepare Tuwon Alabo.
In addition, Tuwon Alabo is widely consumed and enjoyed by most Nigerians, irrespective of tribe. It is popularly known as Lafun or White Amala in the western part of Nigeria.
Learn how to prepare Tuwon Alabo in a few steps!
Equipment for Making Tuwon Alabo
Ingredients for Making Tuwon Alabo
The ingredients needed to make this delicacy are just cassava flour and water
Procedure for Preparing Tuwon Alabo
STEP1: Sieve the cassava flour (Alabo).
STEP 2: Place the cooking pot over medium heat, add water to the pot, and allow it to boil.
STEP 3: Once the water is boiled, remove it from the heat and stir in the sieved alabo with a wooden spatula into the boiled water. Stir continuously until it gets thick and smooth.
STEP 4: Add a little hot water to it and place it back on fire. Leave to cook on medium heat for at least 2 minutes or more to give a smooth-looking tuwo.
STEP 5: Stir again until it becomes smooth and lump-free.
STEP 7: Use the plastic fetcher or the calabash fetcher and pack the tuwo into a food warmer.
STEP 8: Serve hot with any soup of choice.
How to Serve Tuwon Alabo
Tuwon Alabo should be accompanied with Spinach Soup, Okro Soup, Bitterleaf Soup, or any soup of choice. Plain tuwo is somewhat neutral in terms of taste and would taste bland. It would also go perfectly well with any beverage you choose to use.
Occasions Best to Serve Tuwon Alabo
Tuwon Alabo can be served on any occasion whatsoever, as long as the dish is being enjoyed by its consumers.
How to Store Tuwon Alabo
Tuwon Alabo can be stored in a refrigerator like any other dish, and it can last for a very long time, but to the detriment of its delicious taste.
Nutritional Benefits of Tuwon Alabo
Fermented foods offer certain health benefits, including anti-bacterial, anti-inflammatory, and anti-mutagenic activities. It reduces several health risks, such as cardiovascular diseases, cancer, GI disorders, and obesity.
Tuwon Alabo plays an immense role in the health and nutritional status of people, as cassava flour is said to be an option for those with high cholesterol or high blood pressure because it contains low sodium sugar, and fat.
More so, cassava flour (Alabo) contains resistant starches that have a variety of potential health benefits; this includes improved digestive and colon health, improved insulin sensitivity, and may also help with weight loss efforts.
Cassava is widely known for its richness in carbohydrates, which are the main source of energy for the body and contain important vitamins and minerals. Therefore, Cassava Flour Snack, or Tuwon Alabo, is very beneficial to the body.
Conclusion
Now that we’ve seen how easy it is to prepare Tuwon Alabo and its contribution to the body, I trust that I have been able to help someone here with dinner preparations.
If that person is you, please leave a comment in the comments section on how this piece has been helpful to you and the final outcome of your Tuwo.

by Aisha Zakari | May 8, 2022 | Food & Kitchen
Seeing that favorite chocolate cupcake recipe and you can’t get your mind off it because you are without an oven? I say sit back, relax, and enjoy as I’m about to tell you how to make cupcakes at home without an oven. Cupcakes, just like chocolate chip cookies are special delicacies.
There are many ways you can bake at home without an oven:
1. Sand method
2. Stones method
3. Wire rack method
1. The Sand Method
This method is a slow cooking method and transmits heat to the baking pan.
Procedures
STEP 1: Take a big pot and place it on a stovetop or gas top. Make sure the pot is clean and dry. (The stovetop is available on Amazon, Jumia, and Vevor)
STEP 2: Add in sand, either clay or sandy, till it gets to the middle of the pot.
STEP 3: Turn on the heat, cover the pot, and preheat it for 20 minutes.
STEP 4: Carefully place the cake pan with the batter on the sand so as to avoid pouring. (The cake pan is available on Amazon and Jumia)
STEP 5: That’s it; you can bake now.
2. The Stone Method
The stone method is quite similar to the sand, as it gives heat from the bottom to the top. The cake, in turn, absorbs heat, which helps in rising and baking it.
Procedures
STEP 1: Take a big pot and place it on a stovetop or gas top. Make sure the pot is clean and dry.
STEP 2: Add in stones until it gets to the middle of the pot.
STEP 3: Turn on the heat, cover the pot, and preheat it for 20 minutes.
STEP 4: Place your cake pan on the stones carefully to prevent it from pouring.
STEP 5: That’s how to make cupcakes at home without an oven. Just by using stones, it’s that easy.
3. The Wire Rack Method
This is quite simple and easy, as you’ll just be using a wire rack as a means of transmitting heat. (The wire rack is available on Amazon and Jumia)
Procedures
STEP 1: Take a big pot and place it on a stovetop or gas top. Make sure the pot is clean and dry.
STEP 2: Place a wire rack on the pot.
STEP 3: Turn on the heat, cover the pot, and preheat it for 20 minutes.
STEP 4: Place your cake batter gently on the rack.
STEP 5: Wait while the rack does the baking.
Precautions on How to Make Cupcakes At Home Without Oven
Now that you know the method to use, go ahead and make a selection.
1. But remember to reduce the heat from high to medium when you commence with the baking.
2. Another precaution is to add parchment paper to the pan before pouring the batter so as to stop it from burning. (The parchment paper is available on Amazon and Jumia)
3. Remember to grease the pan with butter before pouring the batter into the cupcake liners.
4. To check the doneness of cupcakes, poke a hole into an empty toothpick or skewer. (The skewers are available on Amazon and Jumia). If it comes out clean, you’re done. The cakes are ready!
5. Time varies for baking, but 20–45 minutes should do the trick, depending on the recipe and quantity.
Below is a recipe for how to make cupcakes at home without an oven.
Cupcakes Ingredients
1 1/2 cups of flour
1 1/4 teaspoons of salt
1 1/2 teaspoons of baking powder
2 large eggs
2/3 cups of sugar
12 tablespoons melted butter
2 teaspoons of vanilla extract
1/2 cup of milk
Procedures for Making Cupcakes
STEP 1: In a bowl, sift flour, baking powder, and salt. (The bowl is available on Amazon and Jumia).
STEP 2: In a different bowl, beat eggs and sugar with a mixer or by hand till soft, doubled in size, and fluffy. (The bowl is available on Amazon and Jumia).
STEP 3: Once the butter is soft and fluffy, add melted butter and vanilla extract.
STEP 4: Add in the flour bit by bit until well mixed with the batter.
STEP 5: Add in milk and give this a light mix. Don’t put in too much pressure so as not to over-mix the batter.
STEP 6: Grease your pan and get ready to bake with the sand, stones, or wire rack method. Tada! That’s how you make cupcakes without an oven at home.
Conclusion
Making cupcakes is quite easy now, don’t you think so? If the cake gets burned, simply level out the burned part using a knife or a cake scraper. Nothing to worry about; get baking!

by Fatima Sani | May 8, 2022 | Local Delicacies
Some combinations of foods are just amazing and will make you wonder, ‘Who first thought of preparing this food?’ Dawa da Wake is a northern Nigerian recipe mostly consumed by the Hausas. It is a combination of guinea corn (dawa) and beans (wake) to produce a finger-linking, sumptuous meal that will make you crave more after you first taste it. In this article, I will be teaching you how to make Dawa da Wake (yadda ake Dawa da Wake).
Equipment for Making Dawa da Wake
Ingredients
The following ingredients are needed when preparing Dawa da Wake:
Dawa (guinea corn)
Wake (beans)
Palm oil
Kuli Kuli (groundnut cake)
Water
Salt, Maggi, cabbage, spinach, onions, and tomatoes
Procedure for Preparing Dawa da Wake
STEP 1: Get a big mortar and pestle, pour the guinea corn seeds into it, sprinkle a little water on it, and then pound for like 30 minutes. This is called surfe in the Hausa language.
STEP 2: Pour the pounded guinea corn (dawa) into a large tray and try separating the seeds from the shaft. This is called bakace in Hausa.
STEP 3: Wash the guinea corn very well and drain it, then set it aside.
STEP 4: Over medium heat, put a clean pot, add your beans to it, and allow 10 minutes of cooking time. Then;
STEP 5: Pour the guinea corn and allow to cook for 40 minutes together with the beans
STEP 6: Turn off the heat, pour in a warmer, and set it aside. Then;
STEP 7: Slice your onions, tomatoes, and spinach and set them aside.
STEP 8: Get a clean mortar and pestle and pound the groundnut cake (Kuli-Kuli) until it is slightly coarse in texture. Then;
STEP 9: Get a frying pan over medium heat and fry the contents in STEP 7 for 5 minutes.
STEP 10: Ta-da! Your Dawa da Wake is ready for consumption.
How to Serve Dawa da Wake
Dawa da Wake is best served hot with a chilled drink of your choice.
Occasions to Serve Dawa da Wake Best
Dawa da Wake is mostly consumed or eaten as a basic meal (lunch, breakfast, or dinner). It is hardly served on grand occasions like weddings, birthday parties, festivals, etc.
How to Store Dawa da Wake
It can last for many months without refrigerating as long as it is kept in a safe place away from children and rodents.
Nutritional Value of Dawa da Wake
Guinea corn helps to provide essential minerals and nutrients such as potassium, phosphorus, and calcium. In addition, it aids in the prevention of diabetes, obesity, and cancer. It also aids in the prevention of heart disease and constipation.
On the other hand, the beans in it help in the provision of folate, protein, and antioxidants. It also helps in reducing the risk of cancer, and prevention of fatty liver, among other benefits.
Conclusion
Dawa da Wake is easy to make. The only stressful part is removing the shaft of the guinea corn seeds (i.e., the surfe part). We all know that pounding is not easy, and this one takes minutes to achieve the desired result, depending on the quantity you intend to have.
You could just prepare this meal in jollof form.
I’m optimistic that this piece was worthwhile for you.
Anyway, that’s a wrap for this delicious meal. Now that you know how to make Dawa da Wake (yadda ake Dawa da Wake), why don’t you try making it for yourself or your family and tell us your experience in the comments section below?
You are always welcome to Northpad Nigeria for more local Northern Nigerian delicacies.

by Aisha Zakari | Apr 2, 2022 | Local Delicacies
Kilishi (spicy Nigerian beef jerky) is a popular Northern snack and a delicacy obtained from drying meat for a long period of time. This Kilishi recipe is sold mostly in the Northern parts of Nigeria as it originated from Hausa, but the good news is you can also make this delicacy at home.
Let’s tell you how.
Equipment for Making Kilishi
Ingredients
Boneless meat
1-2 tablespoons of honey
1-2 tablespoons of olive oil
2 tablespoons red food coloring
1-2 tablespoons vinegar (optional)
Salt to taste
1-2 seasoning cubes
1 tablespoon garlic (powdered)
1 tablespoon onion powder
½ teaspoon of powdered cloves
1 tablespoon dried pepper (crushed pepper or cayenne pepper)
½ teaspoon of nutmeg (powdered or crushed)
Procedures for Making Nigerian Beef Jerky
STEP 1: Make sure you wash your boneless meat carefully before preparing this Kilishi recipe. Remove any trace of fat from it.
STEP 2: Carefully slice your meat as thin as possible using a sharp knife. Slicing meat is easier when it is frozen. If you can’t do this, get sliced meat from the butchers because they have the sharpest knife for this job.
STEP 3: After slicing all your meat, place it on parchment (or baking paper) on an oven tray.
STEP 4: Bake in the oven for 20–30 minutes at 200F. Then;
STEP 5: Turn the meat pieces over to the other side and bake again for another 30-45 minutes till dry. You notice your meat has a brownish color now.
STEP 6: This method is done easily, thanks to technology. But in the North, instead of using the oven, the meat is dried in the sun for hours till it gets dry. If you don’t have an oven, I suggest you go the local way. It hurts nobody, but it gets the job done.
STEP 7: Now, let’s make our spicy sauce while it continues to bake.
STEP 8: Mix all the ingredients listed above in a bowl.
STEP 9: Using a whisk or a spoon, give this a stir.
STEP 10: Add in water to create a paste and to ease your stirring. Give this mix a stir gradually until the ingredients are well incorporated.
STEP 11: Add salt and a little water if the paste is too thick, or better yet, add water till your desired consistency is achieved.
STEP 12: Now, add in food coloring for that distinct Kilishi recipe look! Then;
STEP 13: Take out the kilishi from the oven.
STEP 14: Using a pastry brush, brush the Kilishi spicy sauce onto the meat. Then;
STEP 15: Brush evenly on both sides till well spread. After this;
STEP 16: Put the meat back in the oven for 10–15 minutes for that dry and crispy taste.
STEP 17: Tada! Note: The longer it stays, the drier it gets. Decide on what texture you want it to have.
Recipes That Best Goes With Kilishi
You can eat kilishi with jollof rice and spaghetti, and it can be used to make soup too. Better yet, enjoy this delicacy with a cold bottle of your favorite soft drink.
Ways to Serve Kilishi
This Kilishi recipe can be enjoyed over lunch and dinner. It can also be made for friends and family over the weekend.
Occasions to serve best
The Nigerian beef jerky can last for months without losing its taste, and as such, it can be served anytime, any day, and, of course, anywhere. Be sure to have something to enjoy.
Nutritional Value of Kilishi
Kilishi is a staple food that is enriched with a unique taste, low-fat content, and nutritional value. It is high in protein and calories but has no vitamins.
How to Store Kilishi
Store Kilishi in a cool, dry place. You can store this in a container or a plastic bag. Make sure it has no contact with water.
Conclusion
There, you’ll never be the same again after making your own Kilishi recipe! Be sure to make some holes in your meat for added beauty and a work of art. Tell us in the comment section when you do.
You are always welcome to visit Northpad Nigeria for more local Northern Nigerian delicacies.
