by Aisha Zakari | Apr 2, 2022 | Food & Kitchen
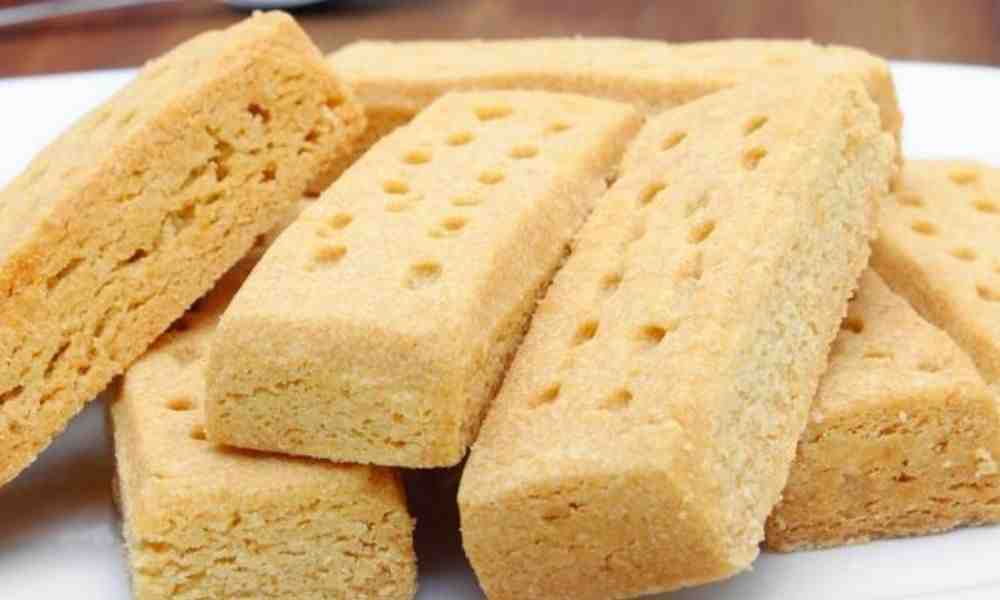
Shortbread, as the name implies, is a finger food to munch on every now and then. This shortbread recipe can be made with just a few ingredients that are mostly lying in your pantry. Let’s get baking.
What is Shortbread?
Shortbread is a traditional Scottish snack with a recipe of one part sugar, two parts butter, and three parts flour. Shortbread doesn’t contain any leavening agents, such as baking powder or baking soda, but mainly just 3 ingredients. Isn’t that interesting?
Equipment for Making Shortbread
Ingredients
2 ½ cups of flour
1 cup (227g) of cold-temperature butter (not margarine)
½ cup of sugar
Procedures for Preparation of Shortbread
STEP 1: In a bowl, add butter and sugar.
STEP 2: Cream this together using an electric mixer for around 5-7 minutes until it becomes creamy, light, soft, and fluffy. Then;
STEP 3: Add in the flour and mix this together till the mixture looks like crumbs. Set the mixer aside.
STEP 4: Lightly grease a baking tray and transfer the dough to it. Now, use your hands to spread it around the edges of the tray.
STEP 5: The dough will be crumbly, but you should be able to press it easily along the edges of the tray. Be careful when pressing.
STEP 6: Using a fork, poke in holes and sprinkle sugar all over the top of the dough.
STEP 7: Now, preheat the oven to 350F to help bake this shortbread recipe. Then;
STEP 8: While preheating, place the baking tray in the fridge for 20 minutes before finally baking.
STEP 9: Place the baking tray in the oven and bake for 20–25 minutes, until the edges get brown and not the top. The edges alone should be brown.
STEP 10: You can cut out the edges and enjoy just the insides, but if you like the crunchy brown sides, enjoy. You can still sprinkle more sugar on top while it’s still warm.
How to Serve Shortbread
Shortbread can be served over tea, a cup of warm milk, or a cup of coffee. You can also enjoy this by drizzling over Caramel Sauce or chocolate sauce
Occasion(s) to Serve Shortbread Best
This recipe can be enjoyed over breakfast with friends, family, loved ones, and even as a couple. It can also be made for Christmas, birthdays, or any other occasion to entertain guests.
How to Store Shortbread
A shortbread recipe can be stored in metal tins, airtight containers, or Ziploc bags for at least 10 days in the refrigerator. If you want them to last longer, freeze them.
Nutritional Value of Shortbread
This sweet tooth delicacy is packed with calories and consuming more than 2-3 may just make you add in weight. But if you’re lucky and do not add in weight, no matter what you eat, you can enjoy this snack. But be careful with your teeth too.
Conclusion
Shortbread recipes are very light and easily digestible, as they are finger-licking and easy to munch on. You can also cut out your own desired shapes and enjoy this any day and anytime. Let us know in the comment section when you give this recipe a try.
Frequently Asked Questions (FAQs)
How is shortbread made?
Shortbread is made from flour, sugar, and butter. These ingredients are mixed until crumbs are formed, and then they are baked in the oven for 20–25 minutes.
Can you make shortbread without an electric mixer?
You do not need an electric mixer to whip up this delicacy at home, but be ready to put your hand to work. Whisk or beat the butter and sugar together till light, creamy, and fluffy.
Should butter be cold or room temperature for shortbread?
Cold-temperature butter is preferable when making a shortbread recipe so as to prevent the dough from being greasy and difficult to roll. Have your butter sit in the refrigerator for around 20 minutes.
Why is my shortbread not crispy?
There are many reasons why this may be happening to you. It could be that the temperature of the oven is not set right, the dough was pressed out or too dry, there is insufficient butter, or there is overbaking. Be sure to measure your ingredients correctly and follow the right procedures.
Are shortbread cookies the same as butter cookies?
No, they are not. Butter cookies are lighter and softer in appearance, whereas shortbread is dense.
How long does shortbread take to harden?
Simply put it in the fridge to chill for at least 15-20 minutes till it hardens.
Why are there holes on shortbread?
Not only do the holes beautify the shortbread, but they also help in evenly distributing heat and making baking easy.
What is the difference between Scottish shortbread and regular shortbread?
There’s no difference between both shortbreads, as the procedures and ingredients are all the same.
by Fatima Sani | Mar 13, 2022 | Local Delicacies
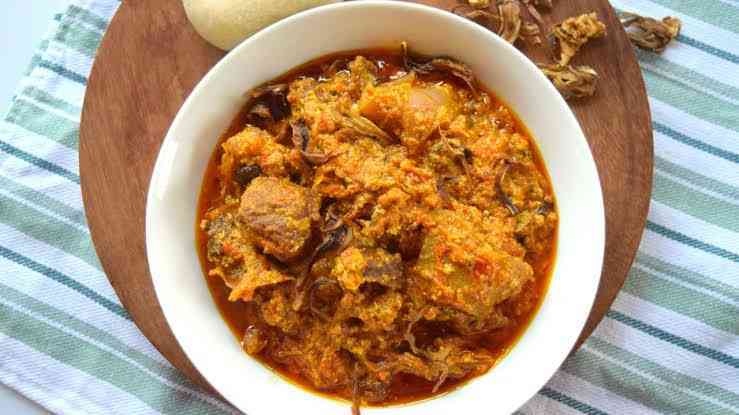
In the northern portion of Nigeria, Miyan Gyada is one of the most popular dishes. It’s not too difficult to make. Because it is mostly cooked with groundnut, Hausas refer to it as Miyan Gyada, while it is called Groundnut Soup in English. In this piece, I am going to teach you how to prepare Miyan Gyada.
Let’s get cooking without wasting too much of your time!
Equipment for Making Miyan Gyada
Ingredients
2 cups of groundnut
Fresh pepper, onions, and tomatoes
2 cooking spoons of palm oil
Meat
Seasoning cubes
Salt to taste
2 medium bunches of spinach or ugwu leaves
Water
Procedure for Preparing Miyan Gyada
STEP 1: Thoroughly wash the meat.
STEP 2: Place the meat in a clean pot over medium heat. Toss in some onions, spices, and a splash of water. Allow for 20 minutes of cooking time.
STEP 3: Prepare the groundnuts while the meat is cooking. Start by removing the stones and dirt from the groundnut, and then place the stone and dirt-free groundnut in a clean tray.
STEP 4: Fry the groundnuts in a clean frying pan for 10 minutes. Allow 5 minutes for cooling.
STEP 5: Using your blender, puree the groundnut until smooth, then set it aside.
STEP 6: Mix the tomatoes, peppers, and onions separately. Before you start blending, make sure you add a little water.
STEP 7: Toss the ground pepper and groundnut into the simmering meat and combine to produce a thick paste. Then;
STEP 8: Thoroughly wash your spinach or ugu leaves and cut or slice them with a chopping board before adding them to the cooking pot.
STEP 9: Pour in the fried palm oil and let it simmer for 5 minutes. Then;
STEP 10: Season with salt and pepper to taste. Allow 10 minutes for cooking.
STEP 11: Your Miyan Gyada or Groundnut Soup is ready for consumption.
Swallow that Goes with Miyan Gyada Best
When eaten with Tuwon Shinkafa or Tuwon Masara, it’s excellent. Teba (Eba), Tuwon Semo, and other swallows are possible. It also goes well with Waina, Sinasir, and Fankasau.
How to Serve Miyan Gyada
Miyan Gyada is best served hot with a glass of chilled water or your favorite beverage.
Occasions to Serve Miyan Gyada Best
It can be eaten as one of the three main meals of the day. It could also be offered at weddings, festivals, walima, and other special occasions.
How to Store Miyan Gyada
It can be refrigerated and kept for several days as long as electricity is available. However, in the absence of a refrigerator, it will only last a few days, and only if you keep warming it in the mornings and evenings. It’s crucial to remember that, while you can preserve it, the taste will be different than when it was freshly prepared.
Nutritional Value of Miyan Gyada
Miyan Gyada is high in energy and contains nutrients, minerals, antioxidants, and vitamins that are beneficial to one’s overall health.
Conclusion
Although its preparation is not simple, you will find that it is well worth the time you put into it because the taste is out of this world. You should try to prepare Miyan Gyada for yourself or your family now that you know how to make it.
If you find this article helpful, please leave a comment in the comments section below.
You are always welcome to visit Northpad Nigeria for more local Northern Nigerian delicacies.

by Angela Bala | Mar 13, 2022 | Food & Kitchen
Irish potatoes (white potatoes) are a common food in many parts of the world. They are one of the most consumed and enjoyed vegetables worldwide, as they are very easy to prepare and pleasing to the eyes and stomach. Due to the versatility of Irish potatoes, they have become a primary ingredient in all types of cuisine, as they can easily be fried, boiled, mashed, baked, or cooked as porridge. It also serves as a complement to different dishes, and new recipes can be created from them, like our delicious Irish potato porridge recipe for today.
Irish potato porridge, also known as white potato porridge, is a simple and fast meal to prepare, just like sweet potato porridge and yam porridge. It is not only super mouth-watery but also naturally packaged with medicinal benefits. Interested? Let me guide you through.
Equipment for Making Irish Potato Porridge
Ingredients for Making Irish Potato Porridge
To begin with, for this easy Irish potato recipe, we need:
Irish Potatoes
Vegetable oil or Palm oil
Onion
Red and Green Bell peppers (tatta sai)
Chilies (shombo)
Habanero Pepper(atarugu)
Seasoning cubes
Salt (to taste)
Carrots (optional)
Garlic
Ginger
Curry
Scent leaves (efirin)
Fresh Pumpkin leaves (Ugu) or Spinach (Alayaahu)
Water
Stock (chicken meat or fish)—optional
Procedures for Preparing Irish Potato Porridge
The preparation of some Irish potato porridge is somewhat similar to that of yam and sweet potato porridge. However, I really love to get creative and spice things up a bit. So, if you’re curious about this special and easy recipe, keep reading!
STEP 1: Wash and season beef, chicken, or fish with enough garlic, ginger, curry, thyme, and seasoning cubes to your own taste (for this Irish potato porridge recipe, I will be using beef). Cook till almost tender.
STEP 2: Separate the beef from the stock once it is cooked and cut the beef into bits. Set aside.
STEP 3: Add a little water to the meat stock in order to have enough stock for the potato porridge and boil.
STEP 4: Peel the potatoes, wash them, and cut them into medium sizes. Stir in potatoes to the already boiling beef stock and cook for at least 5 minutes to absorb the flavor.
STEP 5: Taste for salt and add seasoning cubes if necessary. (It is necessary to cut down on salt since the beef stock is already well seasoned.)
STEP 6: Add in oil of choice (preferably vegetable oil), chopped bell peppers, chilies, and onions. Add beef bits as well, and leave the mixture on fire to cook on high heat till it becomes very soft.
NB: Unlike yam and sweet potato, Irish potato is waxy in nature. It does not have a high starch content as it still holds its form even after cooking, which is why it is less likely to be mashed and to take on a thick form on its own. So you can decide to remove and mash some of your potatoes and add them back to help thicken the porridge if you think it’s too watery.
STEP 7: While the porridge is still cooking, wash and cut the leaves and carrots.
STEP 8: Remove the lid and stir the potato porridge well, then add the carrots, pumpkin leaves, and scent leaves. Reduce heat and leave to simmer for about 3 minutes.
STEP 9: Put off the heat and serve steaming hot.
How to Serve Irish Potato Porridge
This Irish potato porridge can be served as a main dish or as a side dish; whichever way, it still tastes great. It can absolutely be enjoyed with bread or any desired pastry, and beverages of any kind, like zobo, are also welcome to complement this yummy dish.
Occasions Best to Serve Irish Potato Porridge
The serving of Irish potato porridge is up to you! It can be served for breakfast, lunch, or dinner, whichever way you prefer, and on any occasion. Serve this at any event, and I bet your guests will come asking for more.
How Irish Potato Porridge is Stored
Leftover Irish potato porridge should always be stored in the refrigerator to prevent it from being stale and to ensure proper preservation.
Nutritional Benefits of Irish Potato Porridge Recipe
Studies on Irish potatoes have shown that they have a higher level of dietary fibre and carbohydrate which improves digestion, optimizes body function, and regularizes bowel movements. The vitamin C content in Irish potatoes prevents scurvy and also serves as an antioxidant and anti-inflammatory agent that repairs damaged cells within the body. also supports the immune system and gives relief to any form of inflammation, such as arthritis.
Consuming potatoes will give a good source of potassium to the body which is capable of lowering blood pressure and preventing heart attacks, it also works to reduce cramps, therefore, proving Irish potato porridge is a nutritious and medical dish.
Are there more benefits to eating Irish potato porridge? Oh yes! The dietary fiber and carbohydrates present in the potatoes help with both weight loss and weight gain, which lots of people work hard towards achieving. The nutrients obtained from eating a potato dish also help the skin regenerate and maintain healthy skin.
Is that all? Oh no! Because of the other ingredients present in the dish, it is loaded with carbohydrates, proteins, minerals vitamins, and even fat and oil—these are what I like to call the complete package.
Conclusion
And it’s a wrap for this luscious Irish potato recipe my dear comrades! It is indeed very simple, easy to prepare, and has a variety of impressive health benefits. I have no doubt that you can make this Irish potato porridge at home for your family and friends. Please make me proud by sharing their thoughts and yours in the comments section below. Let’s get cooking guys!
by Fatima Sani | Feb 13, 2022 | Food & Kitchen
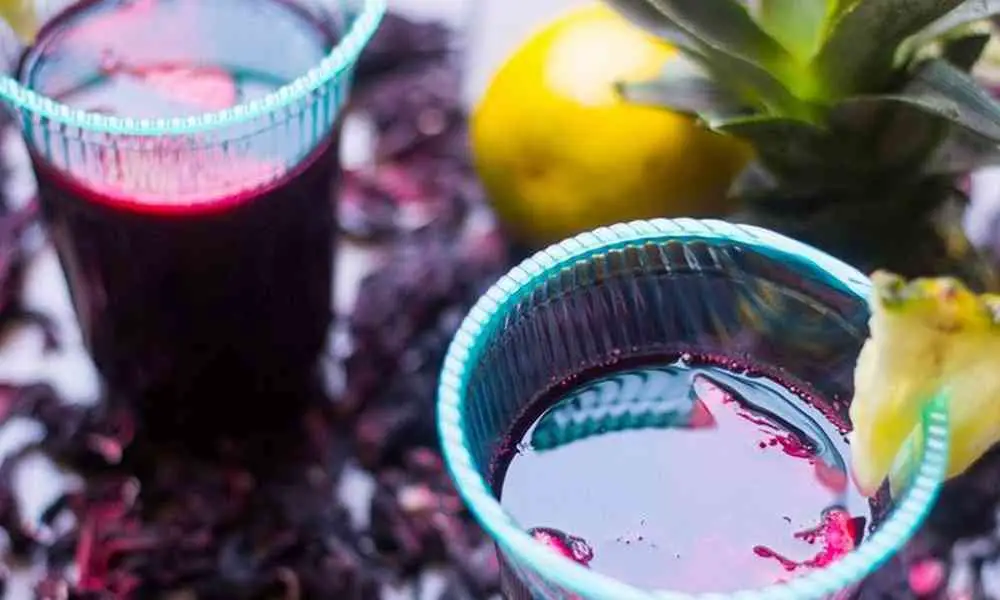
The Zobo Drink recipe is a drink well consumed in all parts of Nigeria. It is made of Roselle or hibiscus leaves. It makes a great occasion drink. In addition, it offers a lot of health benefits, which makes it one of the healthiest drinks. In this article, I will be teaching you how to prepare your delicious drink so that after tasting it, it will keep you wanting to make more and more of it.
What are we waiting for? Let’s go!
Equipment for Making Zobo Drink
Ingredients for Making Zobo Drink
The following ingredients are needed when preparing Zobo Drink:
4 cups of dry zobo leaves
2 spoons of ground ginger
1 tablespoon of cloves (kaninfari)
2 slices of pineapples
7 litres of water
6 small pieces of potash (kanwa) or baking powder.
Sugar
Flavor
Foster Clarks, Nutri C, and Jolly Juice (optional)
Cucumber
Procedure for Preparing Zobo Drink
STEP 1: Pour the zobo leaves into a clean tray and remove dirt and stones.
STEP 2: Pour the leaves into a clean bowl and add some clean water. Then;
STEP 3: Rinse out the dust from the zobo leaves with clean water. When well rinsed, pour into a clean pot.
STEP 4: Over medium heat, place the pot and allow it to boil. Add potash or baking powder.
STEP 5: Wash and cut the pineapples into thin slices and add them to the pot. Allow it to continue boiling for at least 30 minutes.
STEP 6: When the zobo leaves are completely soft, turn off the heat and set them aside to cool for more than 20 minutes.
STEP 7: Stir the zobo leaves, and then pour the zobo into a cheesecloth to remove the leaves and tiny particles. You will have a red-like liquid in the clean bowl. Then;
STEP 8: Add water to the quantity you want.
STEP 9: Also, add the ground ginger and your kanamfari (cloves), sugar, and flavor. Stir very well until the sugar completely dissolves.
STEP 10: You could also add Foster Clark, Jolly Juice, and/or Nutri-C.
STEP 11: Slice your cucumber into small particles and set it aside. Then;
STEP 12: Pour the drinks into bottles and add slices of cucumber to each of them.
STEP 13: Your Zobo drink is ready!
How to Serve Zobo Drink
The Zobo drink recipe is served chilled. You could serve it alone or with Cincin, Fanke (puff-puff), Doughnut, Fankasau, or any snack of your choice. In addition, it can also go with solid foods like Tuwon Shinkafa, Moi Moi, Danwake, etc.
Occasions to Serve Zobo Drink Best
This drink can be served on any occasion, as long as it is well packaged. You could take it together with your breakfast, lunch, or dinner meals. It is also a good dessert.
How to Store Zobo Drink
The most logical advice is to keep this drink in the freezer—not just in the refrigerator, but in the coldest part of it. Store it there for as long as you want.
Zobo drinks recipes, if not properly stored, spoil easily. It lasts for just 24 hours at its best quality.
Nutritional Value of Zobo Drink
Zobo drinks help relieve menstrual pain, manage high blood pressure, lowering cholesterol, protect the liver, promote weight loss, etc. It also serves as an anti-inflammatory agent, anti-bacterial agent, anti-depressant agent, among others.
Conclusion
To the best of my knowledge, this is the most commonly consumed drink in Nigeria. We often pay money to buy them to take. Since it is something that we consume often, why don’t learn how to make it ourselves?
Try it and tell me your experience in the comments section below.
You are always welcome to Northpad Nigeria for more local Northern Nigerian delicacies.
by Fatima Sani | Feb 13, 2022 | Local Delicacies
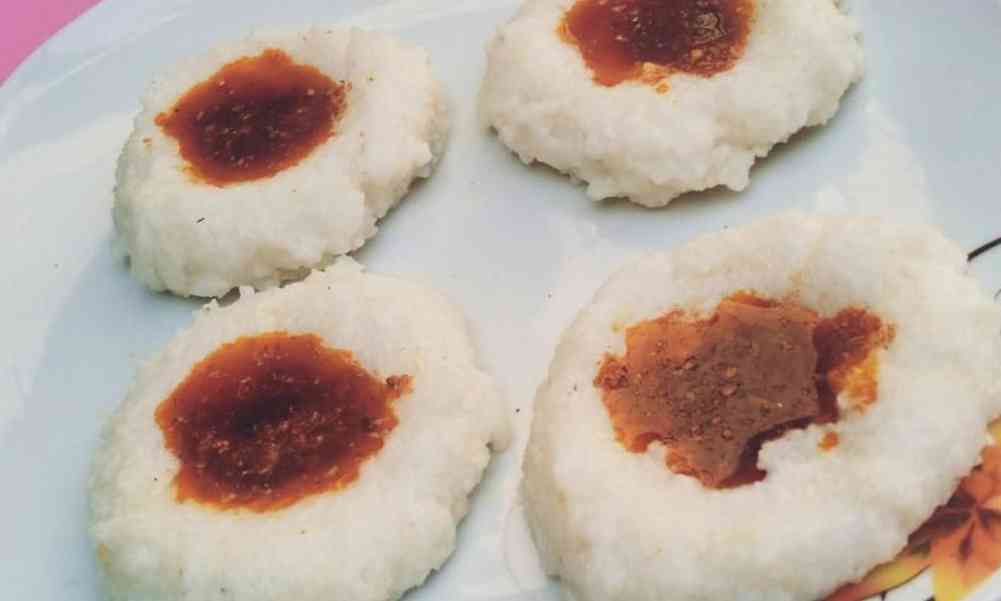
This recipe is one of the local northern Nigerian delicacies that are almost going extinct. Why? Well, it is hard to say, but one thing I know for sure is that it isn’t because of its taste. No. It looks very fine when well prepared. Its major ingredient is coarse maize flour (Tsakin Masara). Shashshaka also refers to Dan Malele – don’t get confused.
Let’s get into it right away!
Equipment for Making Shashshaka
Ingredients
Get the following ingredients ready:
5 cups of coarse flour (tsakin masara)
2 cups of water
Seasoning cubes
Palm oil
Salt to taste
Onions
Ground pepper
Procedure for Preparing Shashshaka
STEP 1: Pour clean water into a pot over medium heat and allow it to boil.
STEP 2: Wash the tsaki properly, remove dirt, stones, and chaff (dussa), and set it aside. Then;
STEP 3: Pour the tsaki into the boiling water and stir it gradually to avoid lumps.
STEP 4: When it starts getting thick, leave it to cook for 30 minutes. Then;
STEP 5: Switch off the heat and take it down.
STEP 6: Get a tray and pour the shashshaka on it. Then;
STEP 7: Allow it to cool for more than 10 minutes.
STEP 8: Get a clean knife and cut it into your desired sizes and shapes. Then;
STEP 9: Over medium heat, put a frying pan and add a little palm oil to it. Slice your onions and add them to the frying pan. Allow frying for 5 minutes.
STEP 10: Remove it from the frying pan, put it on a plate, and add fried palm oil on top of the shashshaka. Add powdered pepper too. Repeat the same process until the pieces of shashshaka are exhausted.
STEP 11: Finally, your Shashshaka is ready for consumption.
How to Serve Shashshaka
The Shashshaka recipe is mostly served with palm oil, powdered pepper, and sliced onions. You could also cut fresh pepper and tomatoes and add them to it; it gets more delicious.
Traditionally, it is normally served on big trays.
Occasions to Serve Shashshaka Best
This is a recipe usually served as breakfast, lunch, or dinner. You could also eat it as an appetizer. However, you do not want to be embarrassed by making it for ceremonies like weddings, festivals, etc.
How to Store Shashshaka
Shashshaka recipe is stored in a cool place and can last for a day or two.
Nutritional Value of Shashshaka
As maize is an energy-giving food, shashshaka serves as an energy-giving food as it provides us with the energy we need for our day-to-day activities.
Conclusion
As delicious as the recipe is, I wonder why it is consumed less and less by the day. Shashshaka is mostly consumed by the poor or average Nigerians, but hey, who says the wealthy can’t have a taste of its sumptuousness?
Try it and tell me about your experience in the comments section below.
You are always welcome to visit Northpad Nigeria for more local Northern Nigerian delicacies.

